
How to Set Up QuickBooks Online MCP Server (Developer Guide)
Install Intuit's official QuickBooks Online MCP server locally, complete OAuth, and connect it to Claude Desktop or another MCP-compatible client.
On this page +
Intuit ships an official QuickBooks Online MCP server: 140+ tools across 29 entity types and 11 financial reports, callable by any MCP-compatible AI client. (New to the protocol? MCP vs. API covers what an MCP server adds on top of QuickBooks’ REST API, and what it doesn’t.) Point Claude Desktop, Claude Code, or another MCP client at it, and it can read and write real QuickBooks data on your behalf.
This guide covers QuickBooks Online. If your books are in QuickBooks Desktop or Enterprise, see QuickBooks Desktop MCP for the options available there.
This guide walks through getting it running locally: creating an Intuit developer app, completing the OAuth handshake, and wiring it into an MCP client. It’s a local stdio server, not a hosted service. There isn’t a URL to paste into a client or a cloud endpoint to point at. The MCP client launches it as a subprocess on your own machine. If you’d rather skip the developer setup, a hosted QuickBooks MCP connector runs the server for you, with per-client routes for querying QuickBooks from Claude and doing the same in ChatGPT.
Prerequisites
- Node.js and npm
- Git
- An Intuit Developer account
- A QuickBooks Online company to connect (a free sandbox company works fine to start)
One decision to make up front: sandbox or production. Sandbox gets you a working setup in minutes. Production has a couple of extra steps, covered later in this guide.
What it costs
Worth knowing before you spend 30 minutes on this.
The server itself is free and open source, and a sandbox company costs nothing. Connecting to a real company still requires an active, paid QuickBooks Online subscription. The API sits on top of the paid product, it doesn’t unlock QuickBooks for free.
Since July 2025, API calls themselves fall under Intuit’s App Partner Program (pricing as of August 2026):
- Writes (create, update, delete) are free and unmetered.
- Reads on the Builder tier cost $0/month and include 500,000 read credits.
- If you go over that free limit, calls are blocked rather than billed.
- Paid read tiers range from $300 to $4,500/month and are mainly for higher-volume usage.
For most single-developer local setups like the one in this guide, the free Builder tier is plenty.
Create your Intuit developer app
Your client ID, client secret, and redirect URI all come from the app you create in the Intuit Developer Portal. Apps live inside a workspace, so if this is your first app, the portal will usually land you on your default workspace and its Apps tab before you create anything.
- From your workspace’s Apps tab, click the + card to create a new app, give it a name, and step through to Permissions. Leave the default scopes checked.
com.intuit.quickbooks.accountingis the one this MCP server uses, and keepingcom.intuit.quickbooks.paymentchecked is fine too.
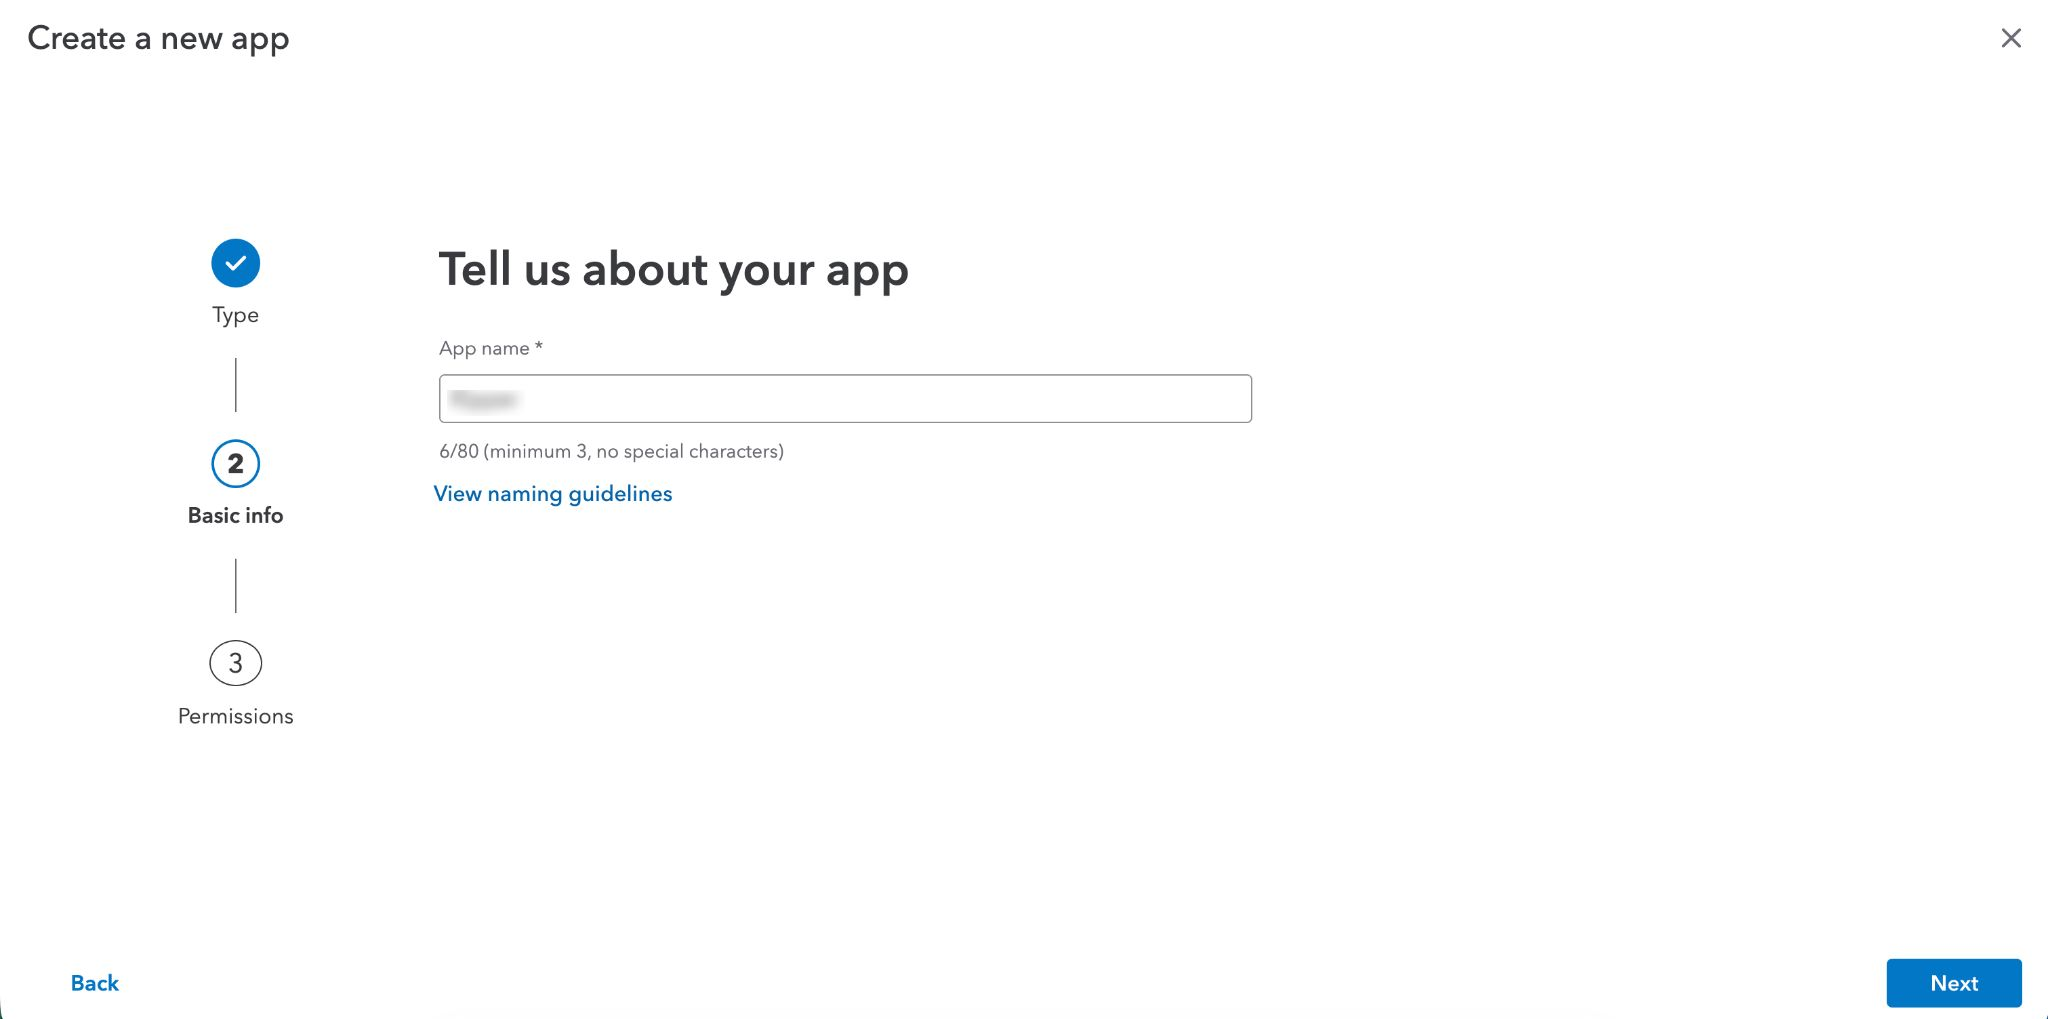 Name your app and continue to Permissions. Redact any real account details before sharing screenshots like this.
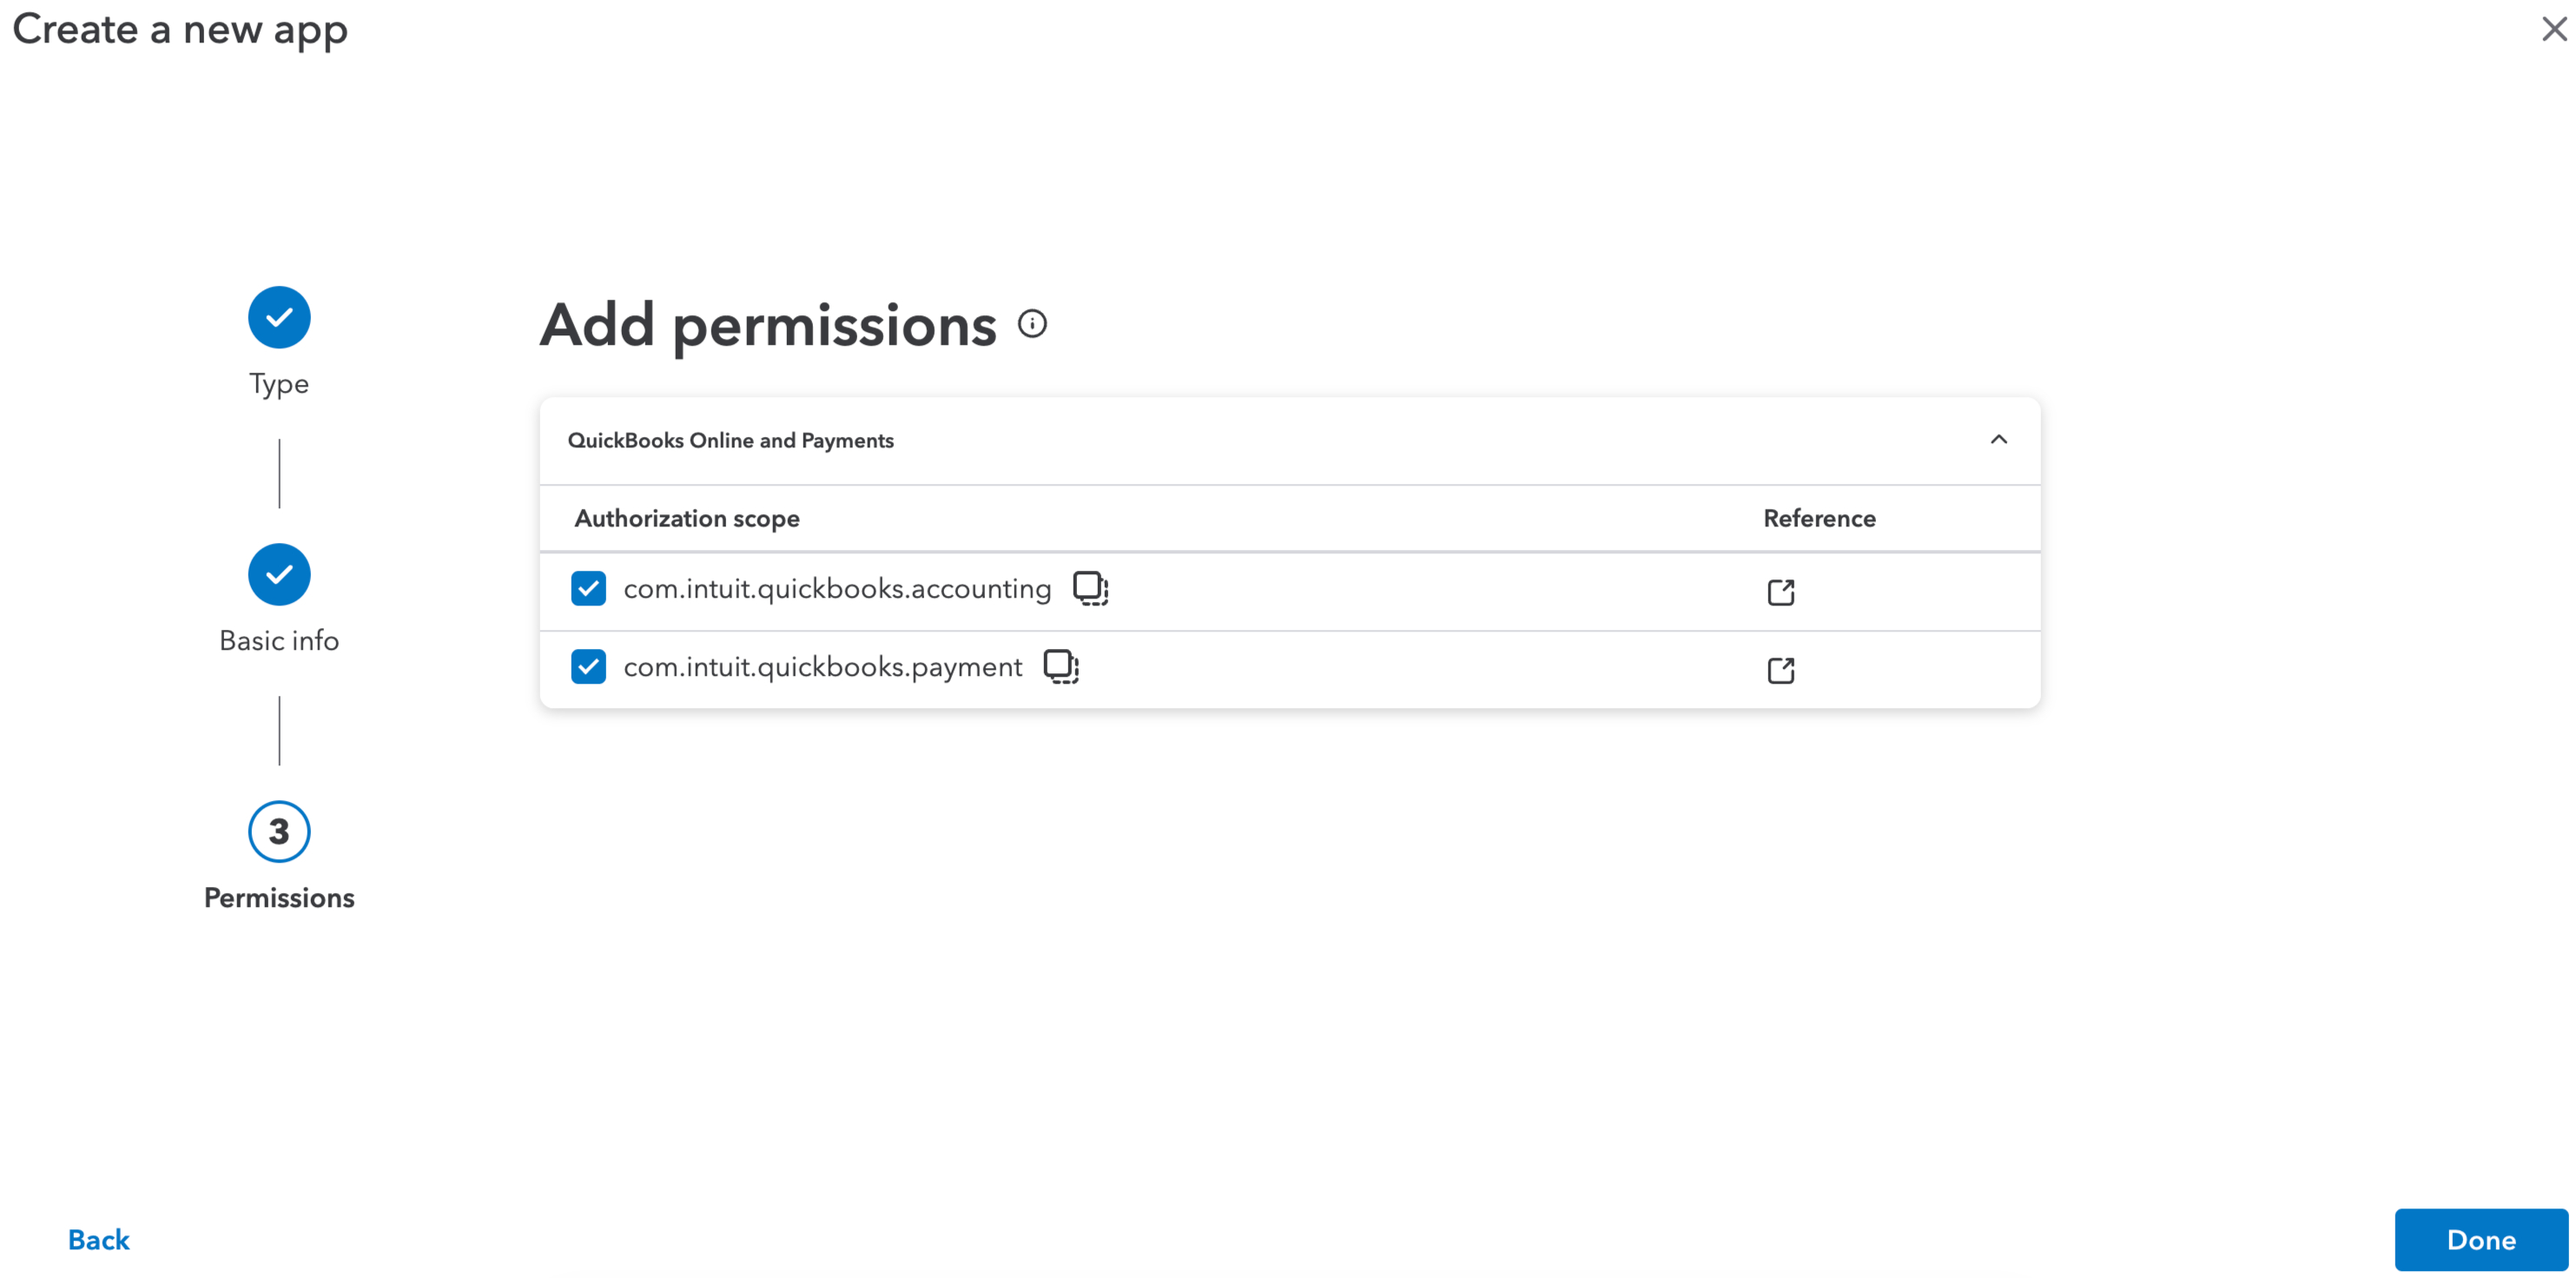
com.intuit.quickbooks.accounting is the scope this server actually uses. Leave the payments scope checked too, it’s harmless.
- Once it’s created, the portal shows a “ready for testing” confirmation with your development Client ID and Secret, masked by default behind a “Show credentials” toggle.
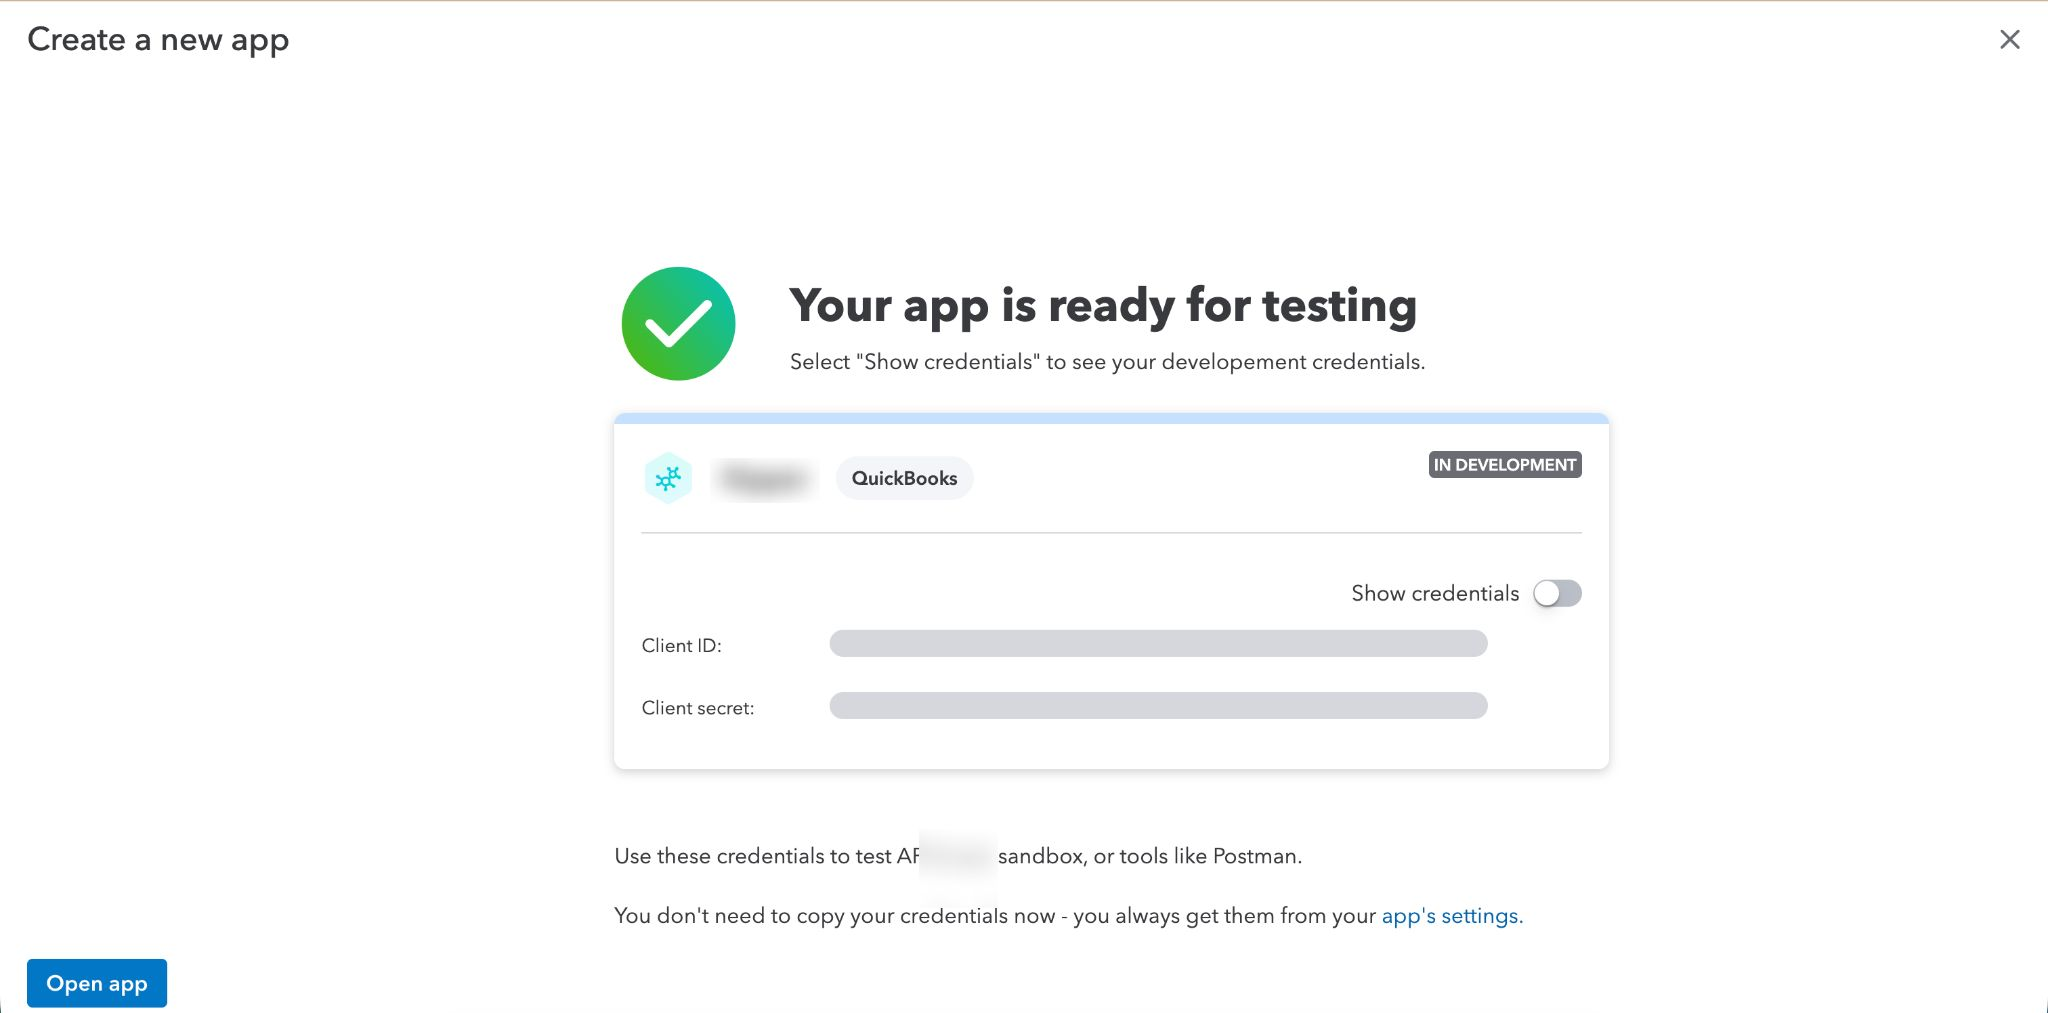 Toggle “Show credentials” to reveal your Client ID and Secret. Never commit these to source control.
- You can always get back to these from the app’s Keys and credentials page in the left sidebar, which has a Development/Production toggle at the top, the same page serves both, it’s not two separate pages.
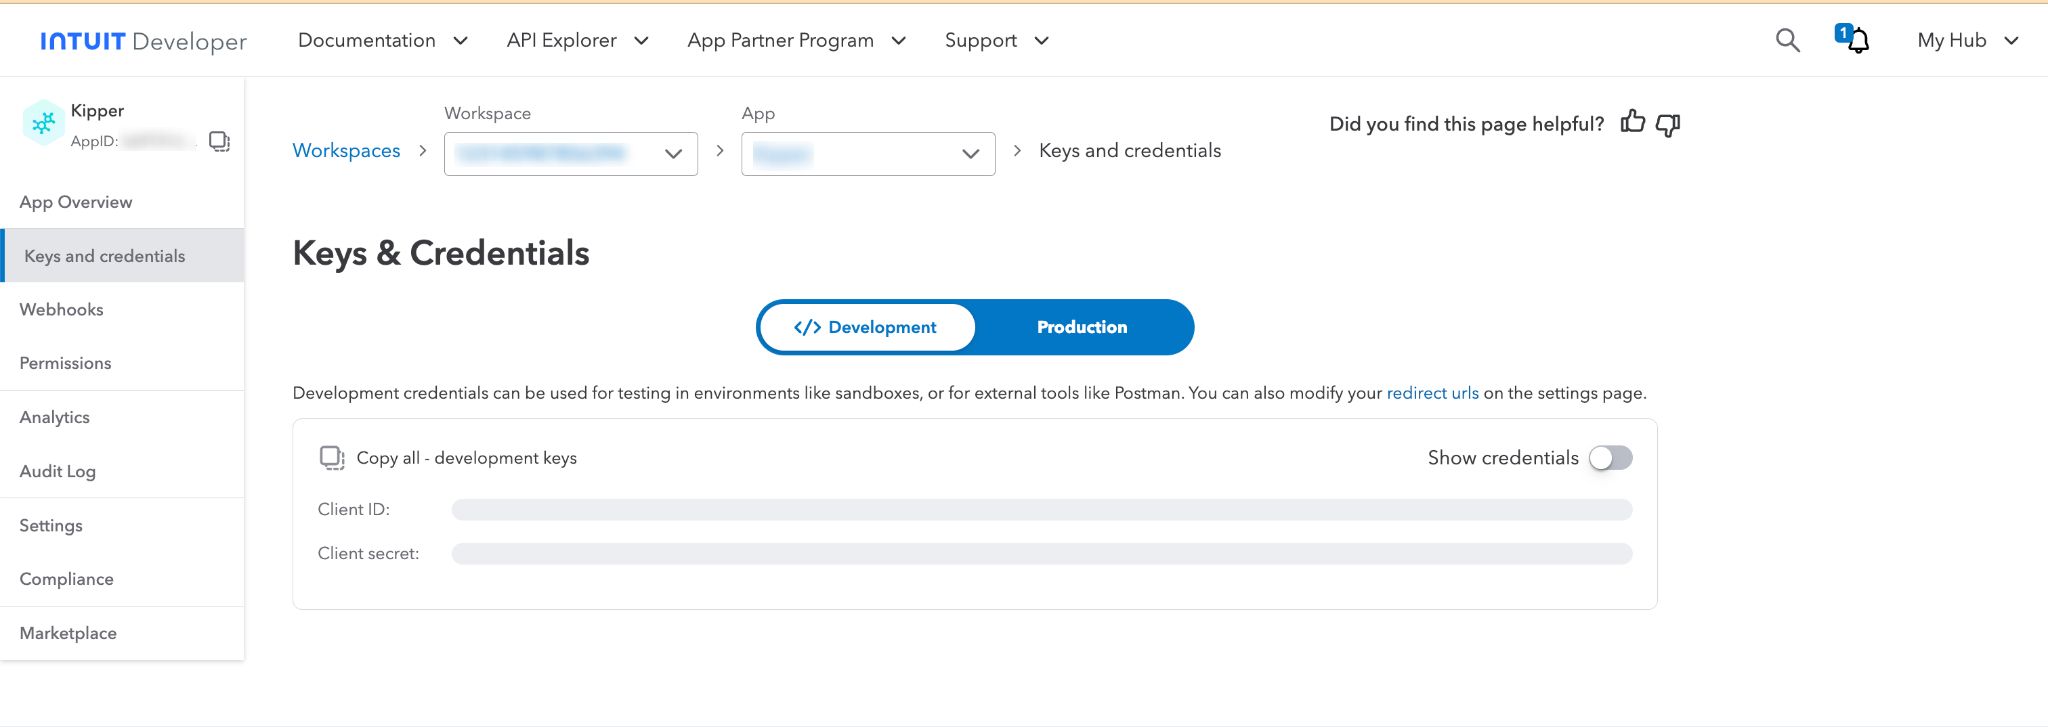 Development credentials work for sandbox testing. Production credentials are a separate step, covered later in this guide.
- Add your redirect URI under Settings → Redirect URIs, which also has a Development/Production toggle. Add
http://localhost:8000/callbackon the Development side. If you’re planning to use the OAuth 2.0 Playground later (Route B below), also add the Playground’s own redirect URI,https://developer.intuit.com/v2/OAuth2Playground/RedirectUrl, to whichever environment you’re testing against.
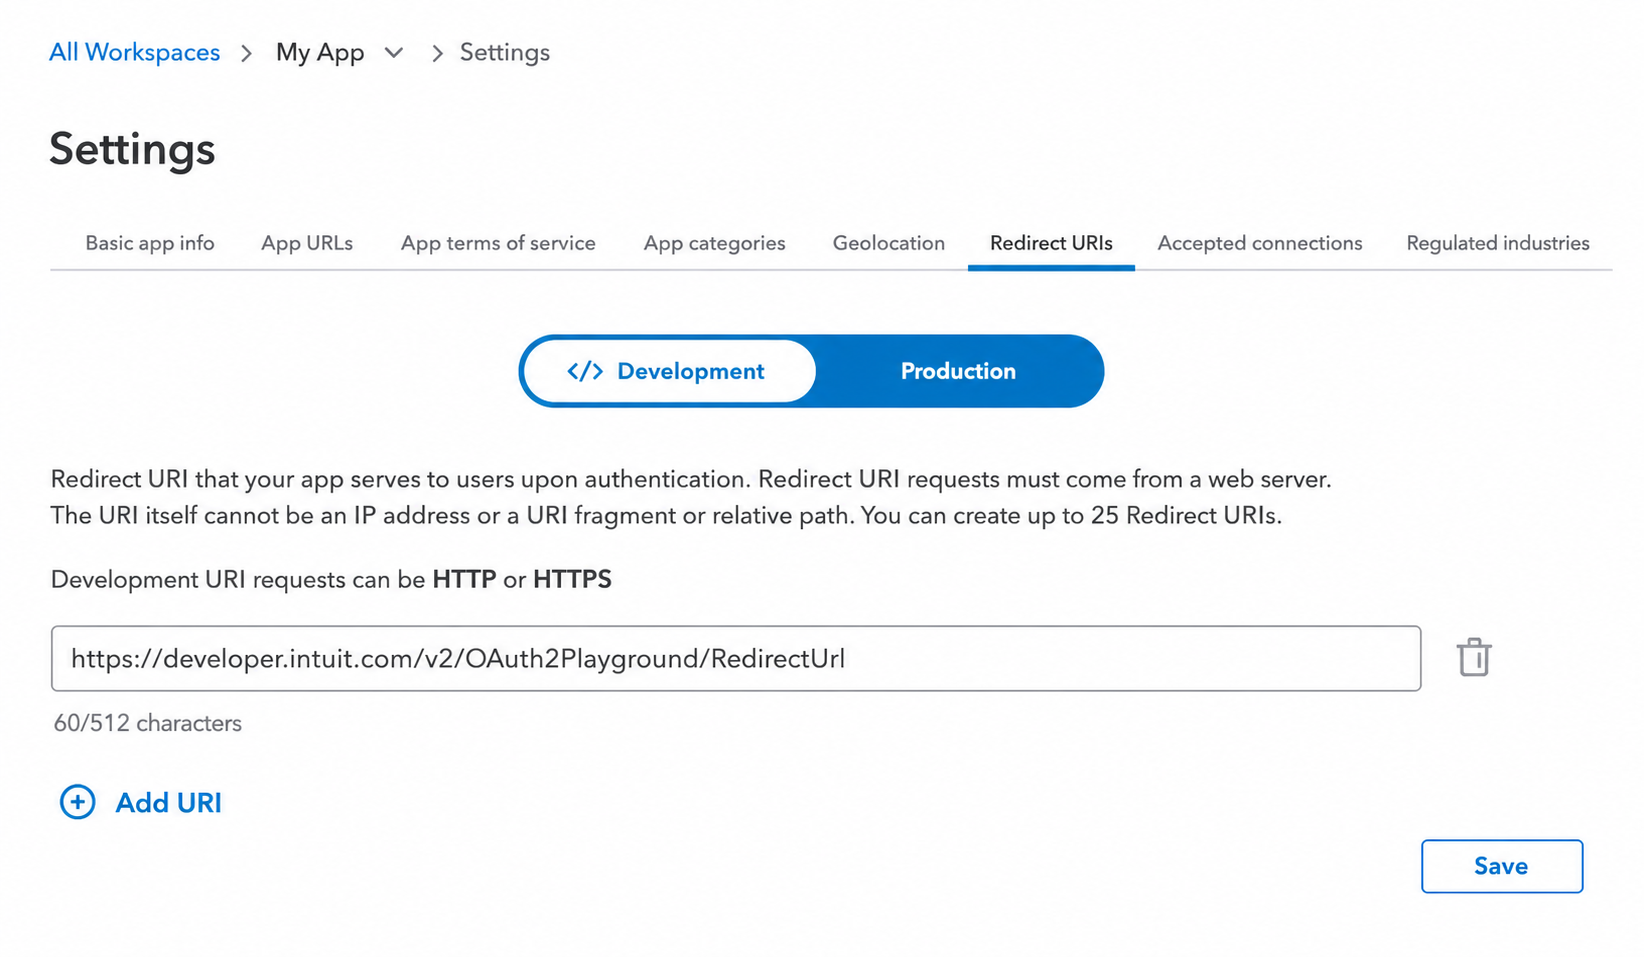 This page can hold more than one redirect URI. The screenshot shows just the OAuth Playground’s, add
 http://localhost:8000/callback as a separate entry on the same page if you’re using the bundled auth helper instead (or both, if you want either route available). The redirect URI has to match exactly: protocol, host, port, and path.
- Create a sandbox company to test against: My Hub (top right) → Sandboxes, then create a new sandbox company, picking a country and a QuickBooks Online SKU (Plus or Advanced).
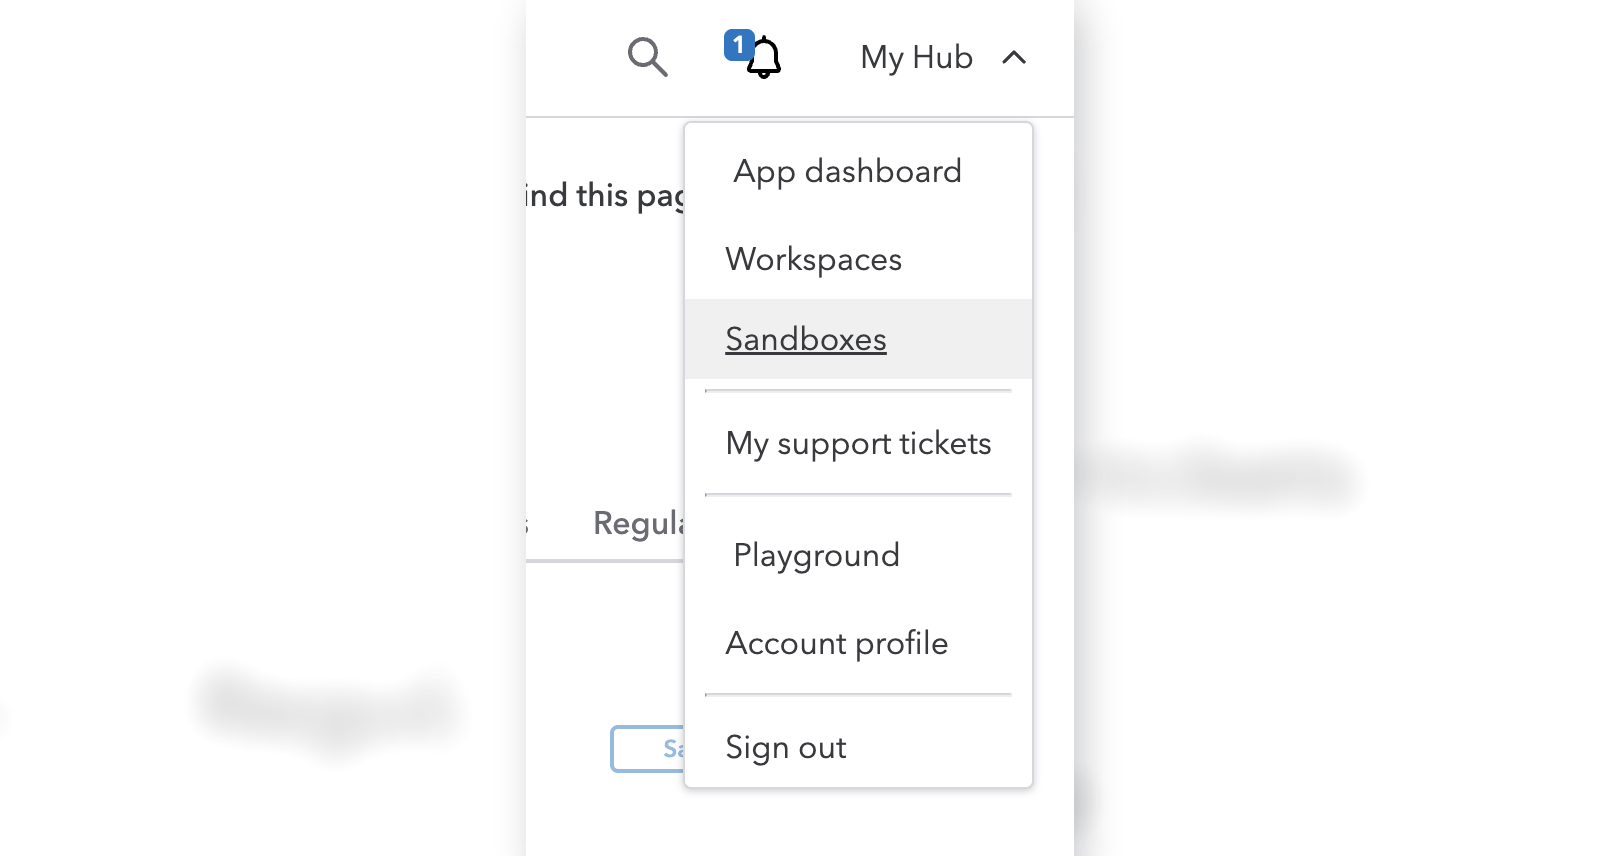 Sandbox companies are managed portal-wide from My Hub, not from inside a specific app.
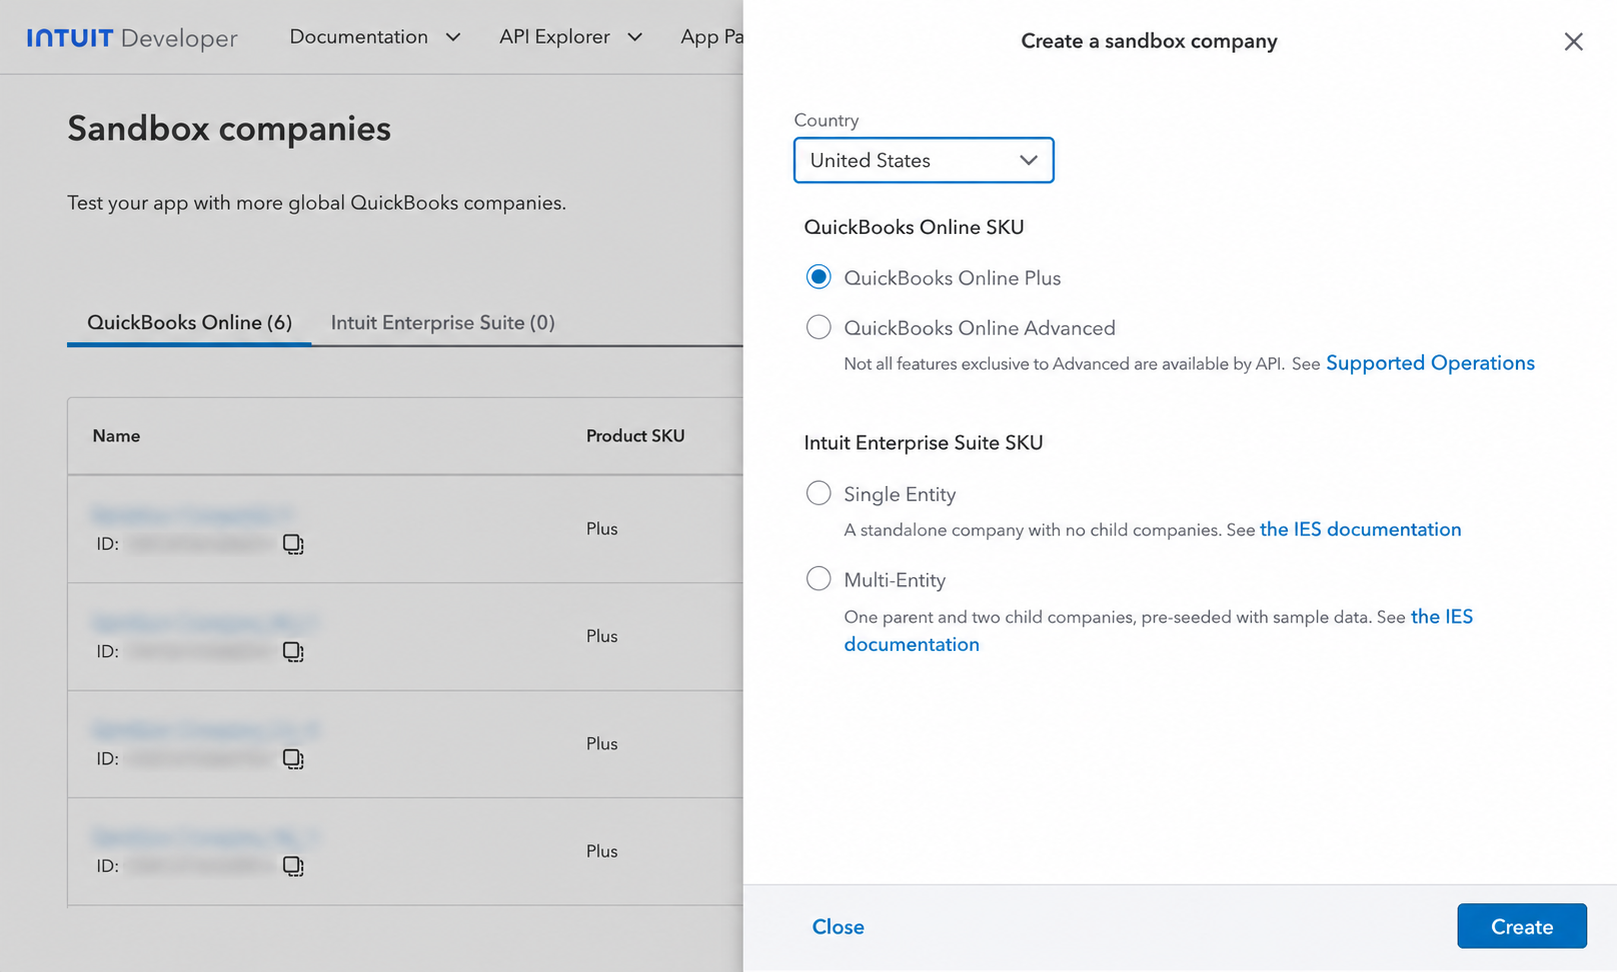 Pick a country and a QuickBooks Online SKU. Plus is fine for testing this server.
Clone, install, build
git clone https://github.com/intuit/quickbooks-online-mcp-server.git
cd quickbooks-online-mcp-server
npm install
npm run build
npm run build compiles the TypeScript source to dist/index.js. That file matters: it’s what an MCP client actually runs. You have to clone and build locally because there’s no hosted version of this server to point a client at.
Set up your .env file
Copy the template:
cp .env.example .envOpen .env and fill in the Client ID, Client Secret, and redirect URI from the app you just created, and set the environment:
QUICKBOOKS_CLIENT_ID=your_client_id
QUICKBOOKS_CLIENT_SECRET=your_client_secret
QUICKBOOKS_REDIRECT_URI=http://localhost:8000/callback
QUICKBOOKS_ENVIRONMENT=sandbox
Leave QUICKBOOKS_REFRESH_TOKEN and QUICKBOOKS_REALM_ID blank for now. The next step fills those in for you, you don’t type them in by hand.
Pitfall:
.envis resolved relative to the compiled module, not your shell’s current directory. This rarely matters when you’re running commands from the project folder yourself, but it matters a lot once a desktop client is the one spawning the process, since it isn’t launching from your project folder at all.
Get your tokens
This is usually the most confusing part, mostly because there are two valid ways to do it and the docs do not make the choice especially obvious. Either route works.
Route A: the bundled auth helper
Run:
npm run authThis reads QUICKBOOKS_CLIENT_ID and QUICKBOOKS_CLIENT_SECRET from the .env you just set up, starts a local server on port 8000, and opens your browser to the QuickBooks authorization page. Once you sign in and approve access, it edits that same .env file in place, filling in QUICKBOOKS_REFRESH_TOKEN and QUICKBOOKS_REALM_ID automatically. You don’t copy or paste anything yourself for this route, the script does it for you. It does need http://localhost:8000/callback registered as a redirect URI (the one you added earlier).
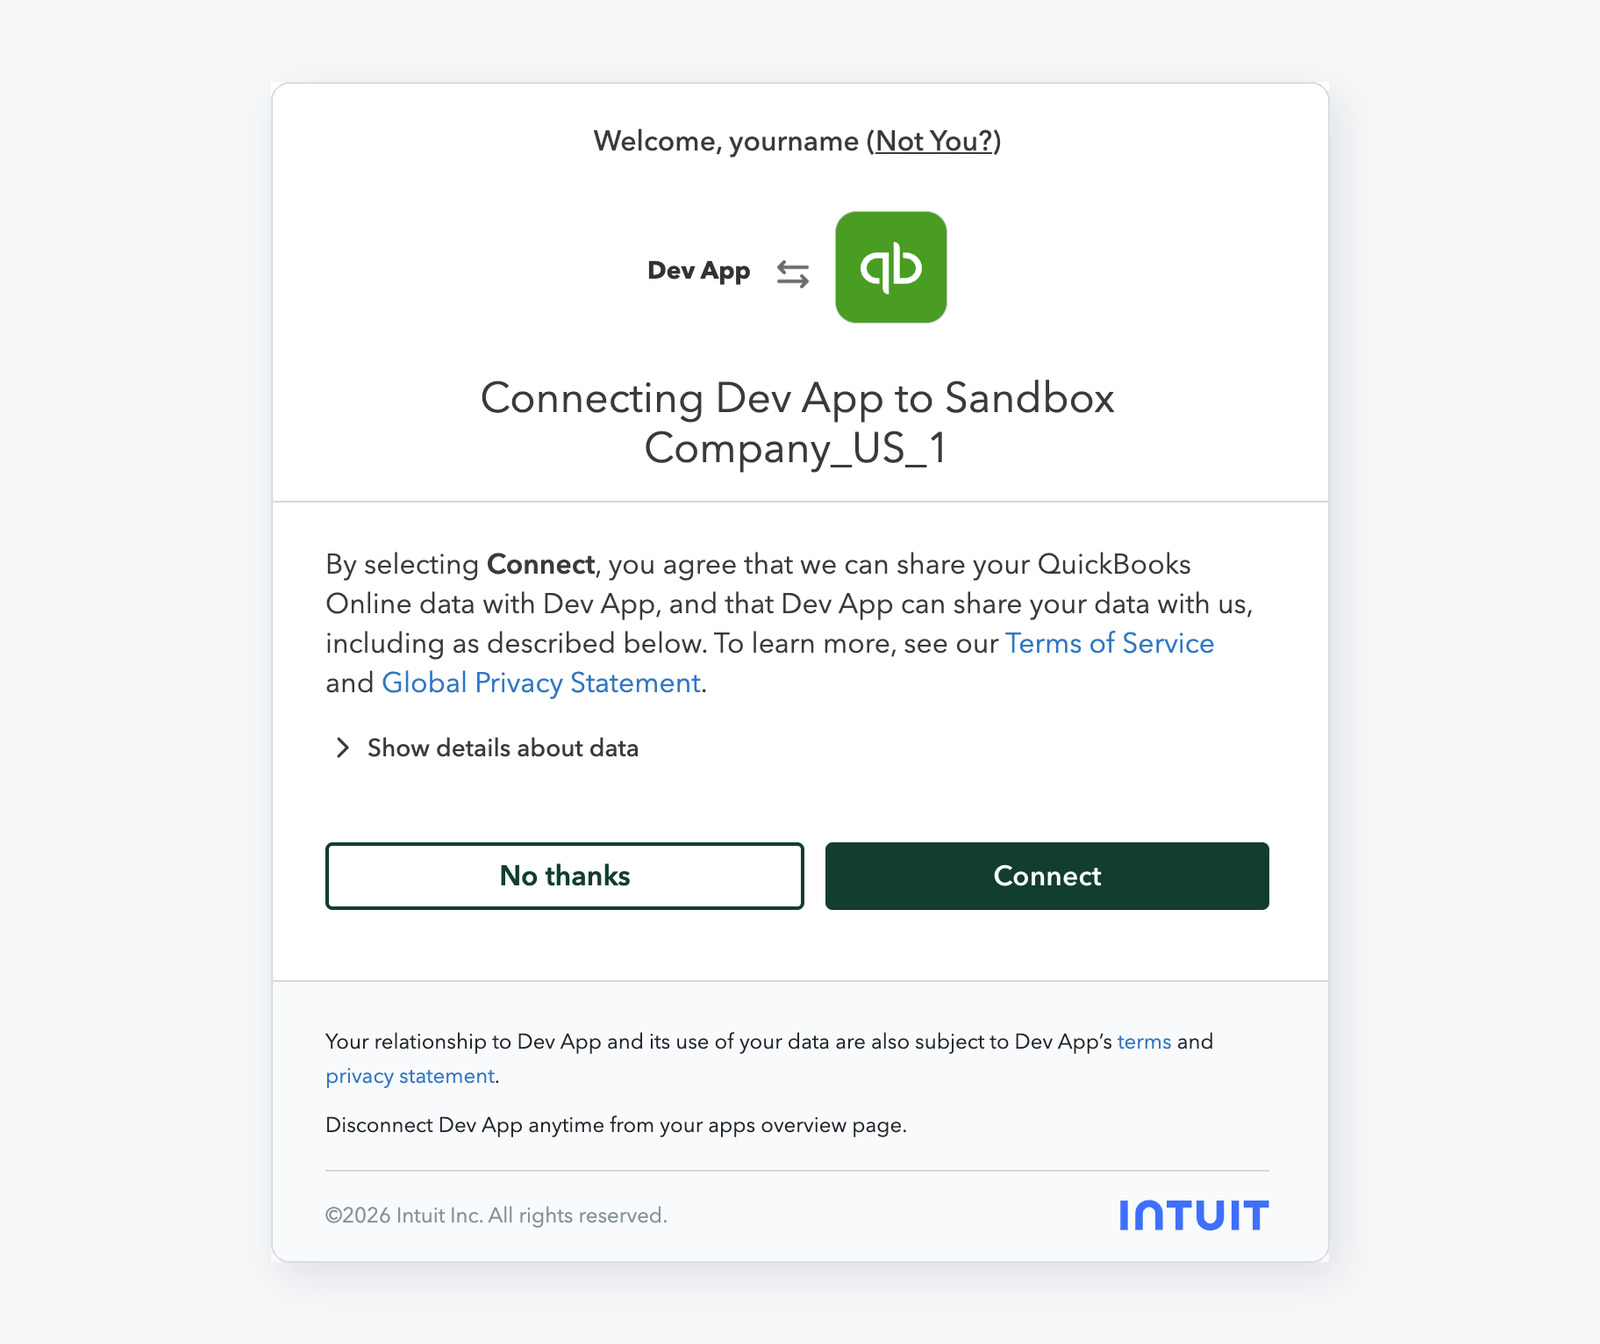 Sign in to the company you want to connect. This determines your realm ID.
Route B: the Intuit OAuth 2.0 Playground
If you’d rather not run a local callback listener, use the OAuth 2.0 Playground in the Intuit Developer Portal. Select the com.intuit.quickbooks.accounting scope, get an auth code, then exchange it for tokens. Unlike Route A, this one doesn’t touch your files for you, so paste the refresh token and realm ID into the two blank fields in .env yourself.
A couple of things worth understanding here, not just doing:
- The realm ID is the company ID. It’s whichever company you sign into during the handshake, and it has to match your environment: a sandbox company gives you a sandbox realm ID, a real company gives you a production one.
- Refresh tokens rotate, and expire after about 100 days of inactivity. If the server hasn’t refreshed in that window, the token goes stale and you’ll need to re-run the auth flow.
Run it locally
There’s no separate server to start. You don’t run this thing yourself, the MCP client does: it spawns node dist/index.js on demand, talks to it over stdio, and kills the process when the conversation or app closes. The localhost:8000 from the auth step was only ever the one-time OAuth redirect, not a server you leave running.
Connect it to an MCP client
The server itself doesn’t care which MCP client launches it. Any stdio-capable client, Claude Desktop, Claude Code, Cursor, and others, spawns the same node dist/index.js process, passes it the same environment variables, and talks to it over stdio. What differs is where each client wants that configuration written and how it surfaces status and logs.
The shape of the config block is always the same:
{
  "command": "node",
  "args": ["/absolute/path/to/quickbooks-online-mcp-server/dist/index.js"],
  "env": {
    "QUICKBOOKS_CLIENT_ID": "your_client_id",
    "QUICKBOOKS_CLIENT_SECRET": "your_client_secret",
    "QUICKBOOKS_REFRESH_TOKEN": "your_refresh_token",
    "QUICKBOOKS_REALM_ID": "your_realm_id",
    "QUICKBOOKS_ENVIRONMENT": "sandbox"
  }
}
A couple of rules apply regardless of client:
- Use an absolute path in
args, not./dist/index.js. Most clients don’t launch from your project folder, so a relative path won’t resolve. - Point at
dist/index.js, which meansnpm run buildneeds to have run first. - Prefer setting credentials directly in this
envblock over relying on.env. It sidesteps the “resolved relative to the compiled module” pitfall entirely when the client, not you, is the one launching the process. QUICKBOOKS_REDIRECT_URIisn’t needed here. It’s only used duringnpm run auth.
For the exact file location, JSON structure, and how to verify the connection, follow the guide for your client:
- How to Connect the QuickBooks Online MCP Server to Claude Desktop
- How to Connect the QuickBooks Online MCP Server to Codex
We’ll add setup guides for other MCP clients here as they’re published.
Restrict what it can do
By default, the server registers every tool it has, including everything under create_, update_, and delete_. Read tools, get_*, search_*, and read_*, are always available and can’t be turned off. The write, update, and delete categories can, with three environment variables:
QUICKBOOKS_DISABLE_WRITE=true
QUICKBOOKS_DISABLE_UPDATE=true
QUICKBOOKS_DISABLE_DELETE=true
Set all three to true any time you’re connecting to a production company, especially for a first pass. There’s no reason for an assistant to have delete access to your books while you’re still confirming everything else works. These flags are the only read-only boundary on this route: QuickBooks publishes no read-only API scope, so the token behind the connection can always write.
Setting it up against production
Once you’re ready to move off sandbox, there’s a step before you touch .env again: get production keys. The development keys you’ve been using so far are tied to sandbox and won’t work against a real company. Development and production keys aren’t interchangeable in either direction, a development Client ID and Secret only authorize sandbox companies, and a production Client ID and Secret only authorize live ones.
To get production keys, go to the app’s Keys and credentials page and switch the toggle from Development to Production. Instead of showing credentials right away, it shows a checklist: App details (about 10 minutes) and Compliance (about 40 minutes), which you can complete in any order.
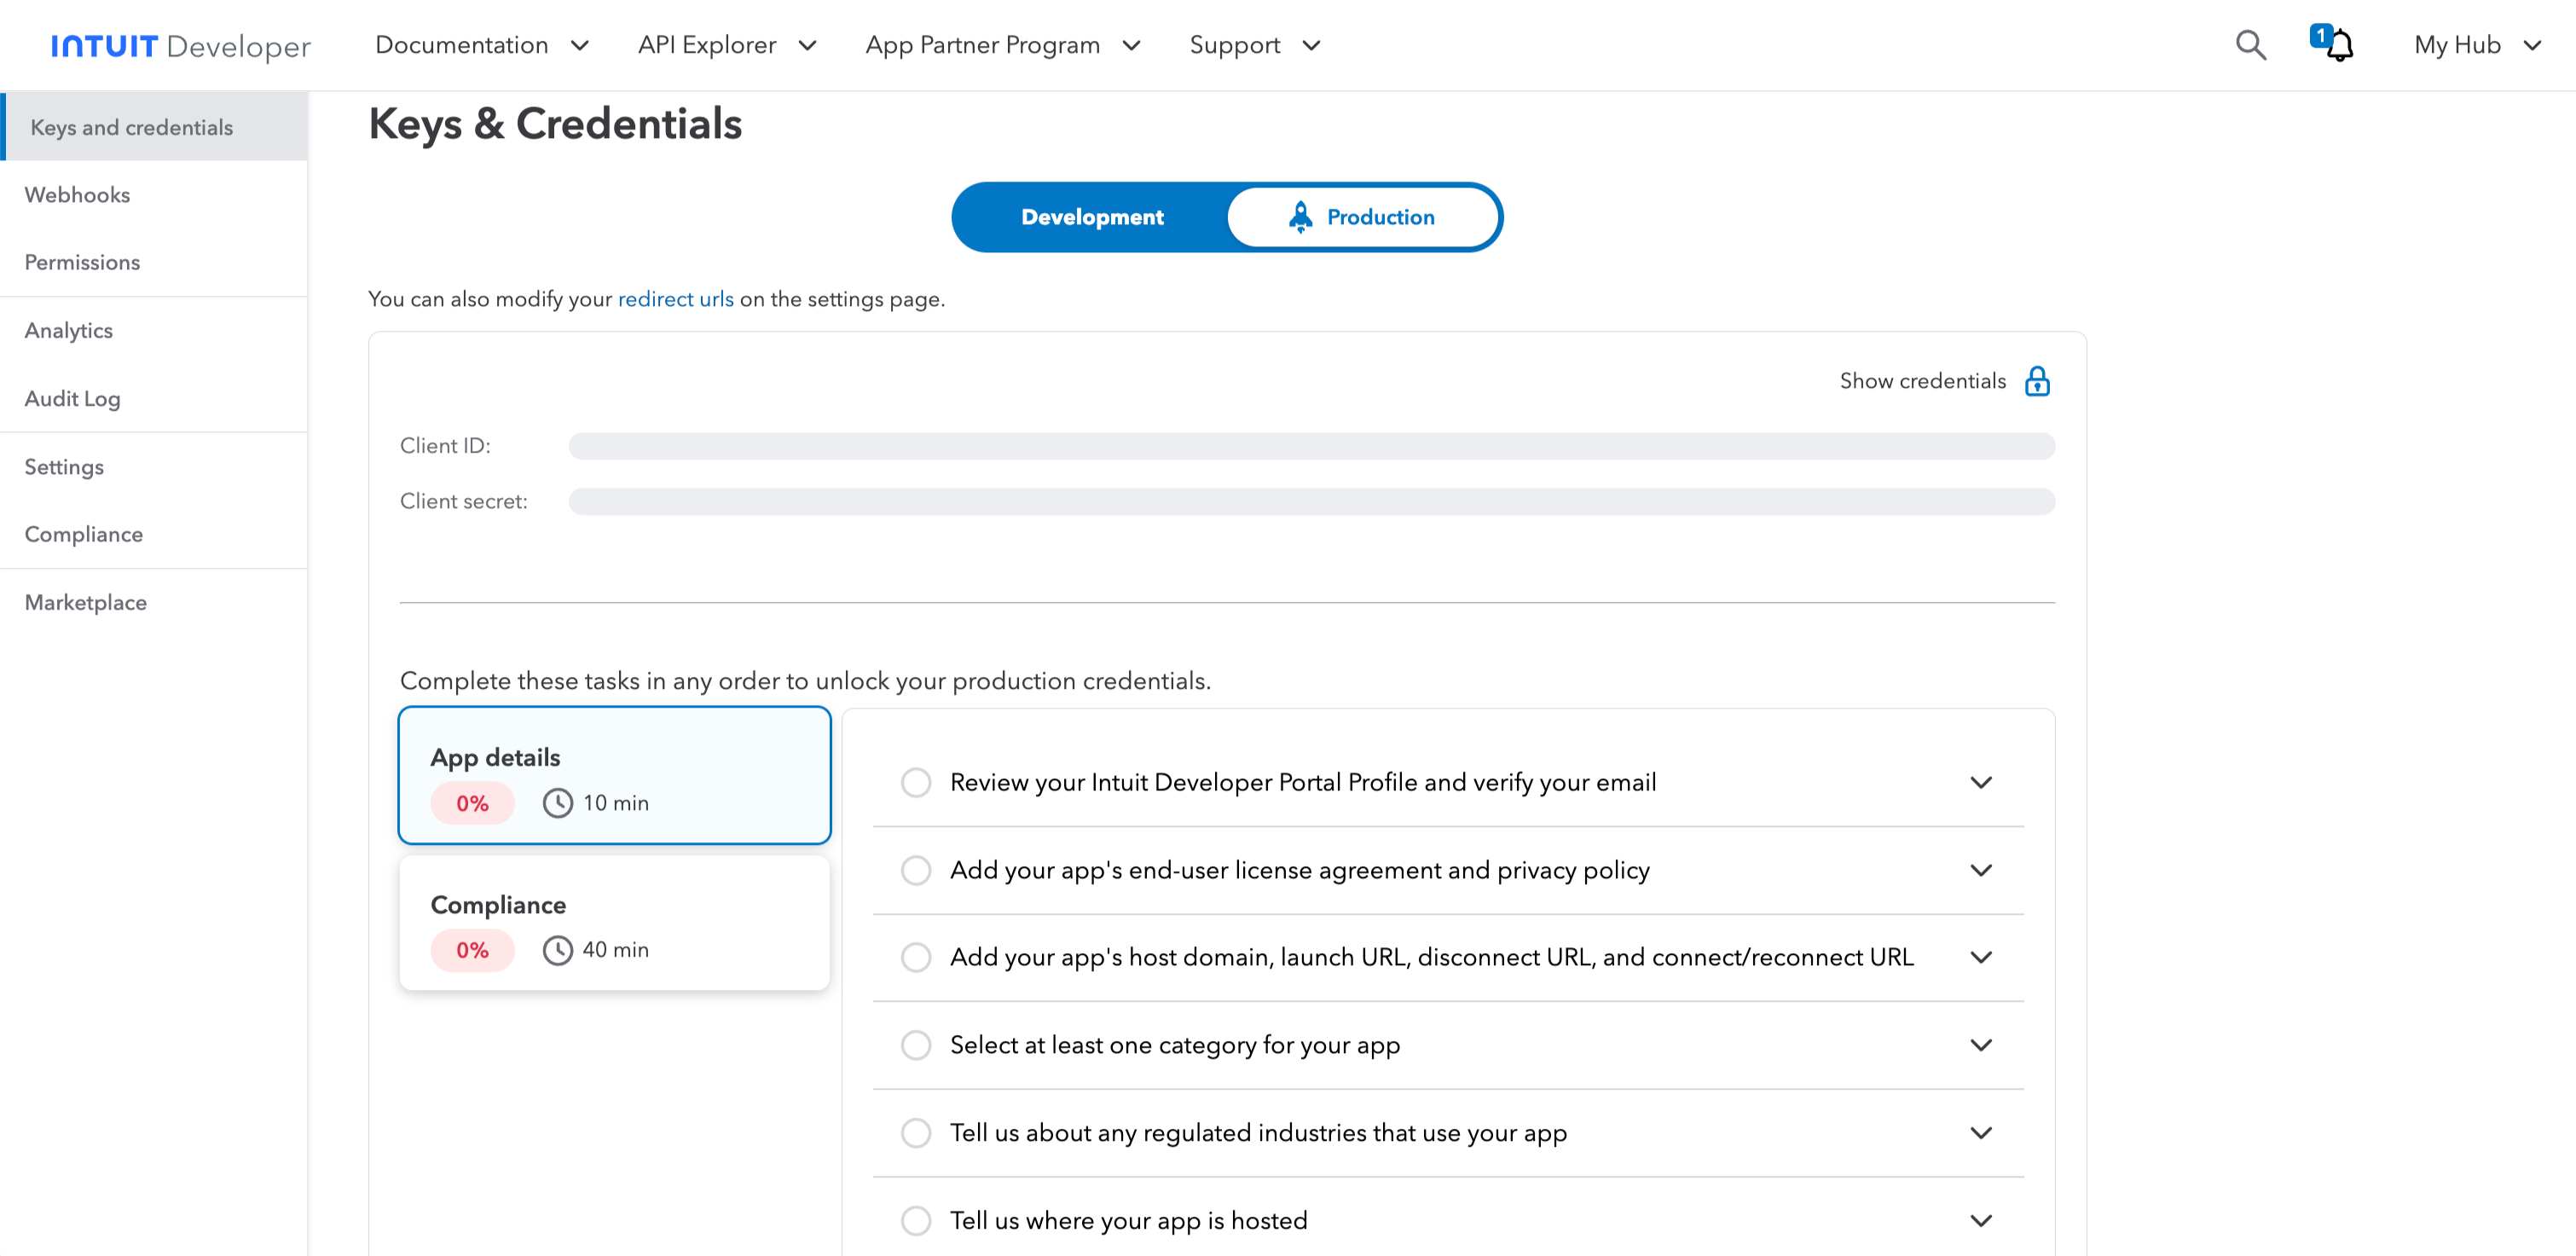 Production credentials stay locked until you complete both checklists. This is Intuit’s App Assessment, broken into concrete tasks.
The checklist covers things like:
- Reviewing your Intuit Developer Portal profile and verifying your email
- Adding your app’s end-user license agreement and privacy policy
- Adding your app’s host domain, launch URL, disconnect URL, and connect/reconnect URL
- Selecting at least one category for your app
- Noting any regulated industries your app serves
- Saying where your app is hosted
Intuit requires this for apps that touch production data. In our case, we still had to complete it for a private app connected only to our own company. None of it costs money, it’s a compliance review, not a paywall, but budget real time for it, the Compliance section alone is estimated at 40 minutes.
Once both sections are complete and Intuit approves them, your production Client ID and Secret appear on that same Keys and Credentials page. Swap those into .env in place of the development keys, set QUICKBOOKS_ENVIRONMENT=production, and run the auth flow again, this time against your real company.
Intuit’s OAuth flow rejects
http://localhostredirect URIs in production mode. This is a common stumbling block. The common workaround is a temporary ngrok tunnel:
ngrok http 8000Add the generated https://<id>.ngrok-free.app/callback URL as a redirect URI on your Intuit app, on the Production side of Settings → Redirect URIs, use it for the one-time handshake, then you can remove it afterward.
After that handshake completes, the refresh token in .env is what the server actually relies on day to day. It rotates on its own; the public URL was only needed to get the first one.
Sharing this with a team
A local server is not a shareable cloud connector, so it’s worth being upfront about the limits. You really have three options:
-
Each teammate replicates the setup. Works, but it’s manual for every person: their own clone, their own build, their own OAuth handshake.
-
Package it as a desktop extension. Add a
manifest.json(mark secrets as"sensitive": true), runmcpb pack, and install the resulting.mcpbfrom Settings → Extensions → Advanced settings → Install Extension…. On Team or Enterprise plans, owners can also upload custom desktop extensions for one-click org distribution. This is the best fit for sharing a server you’ve already built. -
Convert it to a remote MCP server. Host it on a public HTTPS endpoint and add it in Claude from Settings → Connectors. This is the biggest lift of the three, but it’s the only one that avoids per-person local setup entirely.
One more thing to settle either way: a single refresh token authorizes one company. Either one person shares that token as a secret, or each teammate goes through their own authorization.
Limitations
- Local stdio only. There’s no official hosted version, and it isn’t shareable as-is.
- Requires a paid QuickBooks Online subscription for real data.
- OAuth is mandatory. Tokens rotate and the refresh token expires after roughly 100 days of inactivity.
- Production blocks localhost redirects, so you’ll need ngrok or a similar workaround for the initial handshake.
- Production keys require completing Intuit’s App details and Compliance checklists before you can use them. Budget time for that before you can go live.
- Full CRUD access is powerful, and risky against production if you don’t turn off write, update, and delete first.
.envresolves relative to the compiled module, not your shell, which catches people out when a desktop client launches the process.- Sharing with a team means per-person setup, packaging as a desktop extension, or standing up a remote server. There’s no shortcut.
Recap
- Register an Intuit developer app, add the localhost redirect URI, and grab your keys.
- Clone the repo,
npm install,npm run build. - Run
npm run auth(or use the OAuth Playground) to get tokens into.env. - Add the server to your MCP client’s config, using an absolute path to
dist/index.js. See the Claude Desktop guide or the Codex guide for exact steps. - Restart your client and confirm the server shows up as running before you ask it anything.
- Turn off write, update, and delete before pointing any of this at a real company.
If something above doesn’t work on the first pass, QuickBooks MCP troubleshooting maps the common symptoms to their causes.
For how this route compares with every other way to connect AI to QuickBooks, see every route to QuickBooks MCP in one place.