
How to Set Up Xero MCP Server (Developer Guide)
Set up the official Xero MCP server locally with Node.js, a Xero Custom Connection, the Demo Company, and a compatible STDIO MCP client.
On this page +
This guide shows the fastest safe way to set up the official Xero MCP server locally.
You will connect it to Xero’s Demo Company and confirm the setup with one read-only request.
Prefer to connect Xero MCP directly to an AI client? Follow our step-by-step guides for Claude Desktop, Codex, or ChatGPT. Otherwise, continue below to build and test the server locally.
What You Need
Before starting, make sure you have:
- A Xero account
- Access to the Xero Developer Portal
- Node.js installed
- A compatible MCP client that supports local STDIO servers
- A secure place to store your Client ID and Client Secret
An MCP client is the AI or developer app that starts and uses the server.
STDIO is the local communication method between the MCP client and server.
Step 1: Open the Xero Demo Company
Sign in to Xero and open the built-in Demo Company from My Xero.
Use the official Demo Company for your first test because it contains fictional accounting data. Do not use a normal trial organisation renamed “Demo Company.”
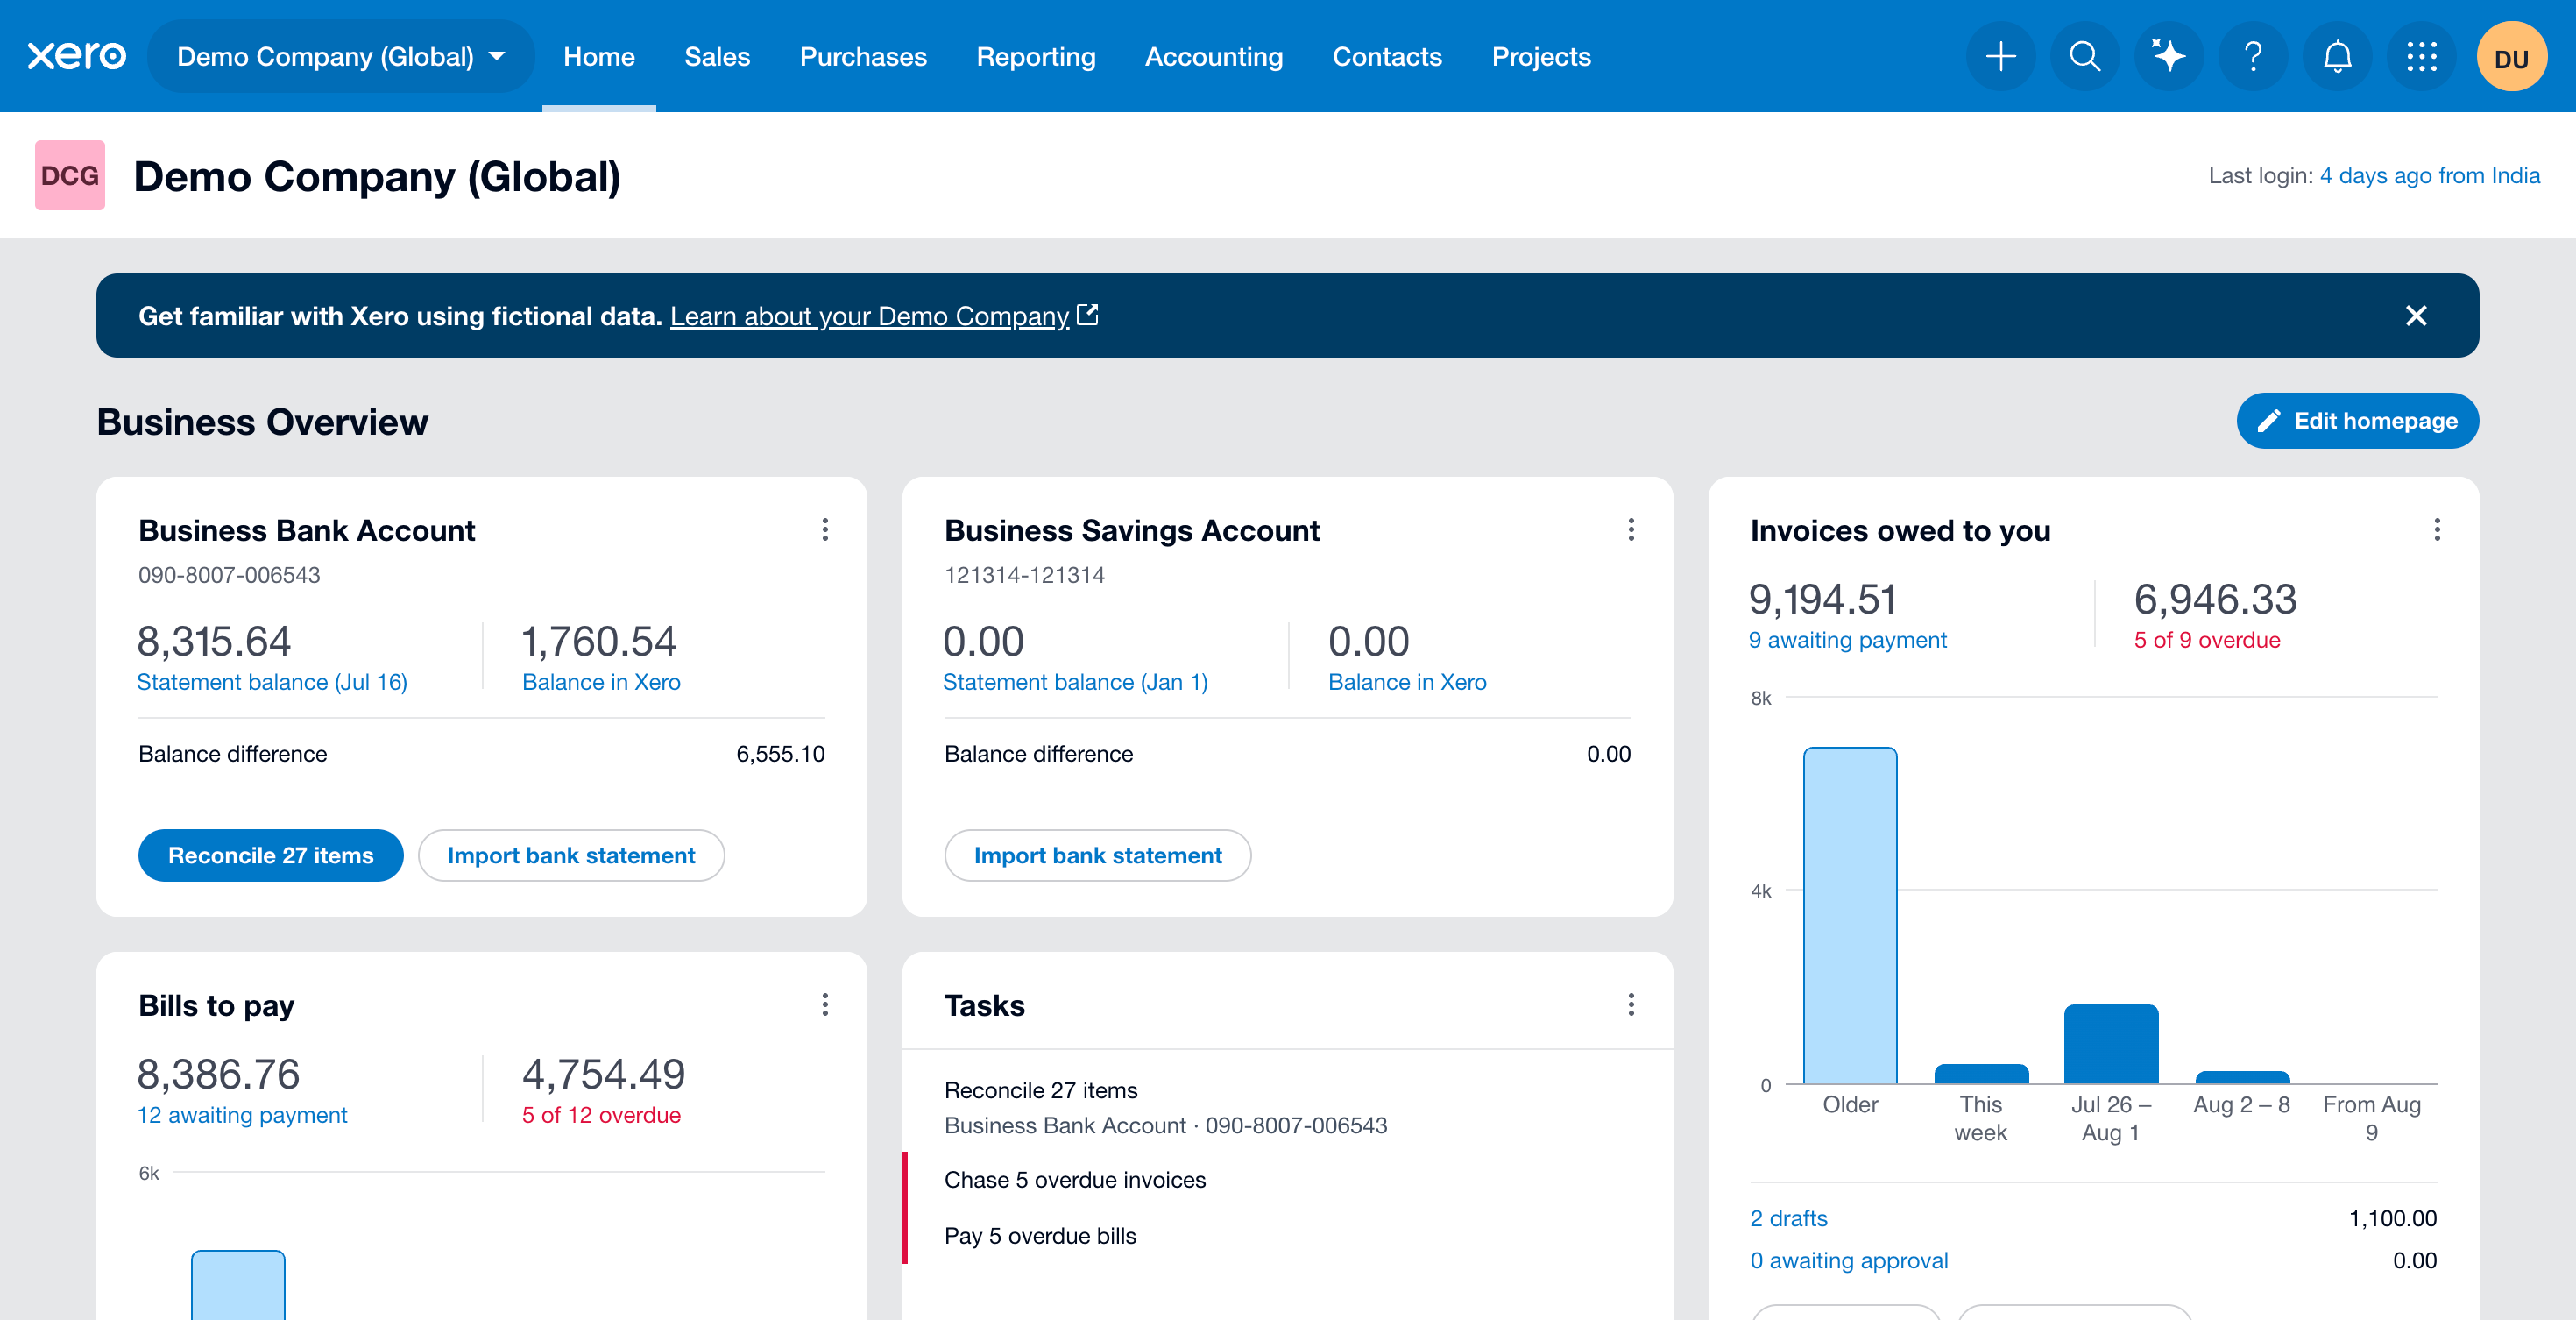
Success check: The Demo Company dashboard opens and shows fictional data.
Step 2: Open Xero Developer
Open the Xero Developer Portal and go to My Apps.

Select New app or Create app.
Success check: You can open the app creation form.
Step 3: Create a Custom Connection
A Custom Connection is Xero’s one-to-one connection for one organisation. (If you need to reach more than one, see using Xero MCP with multiple organisations.)
Choose Custom connection as the integration type.
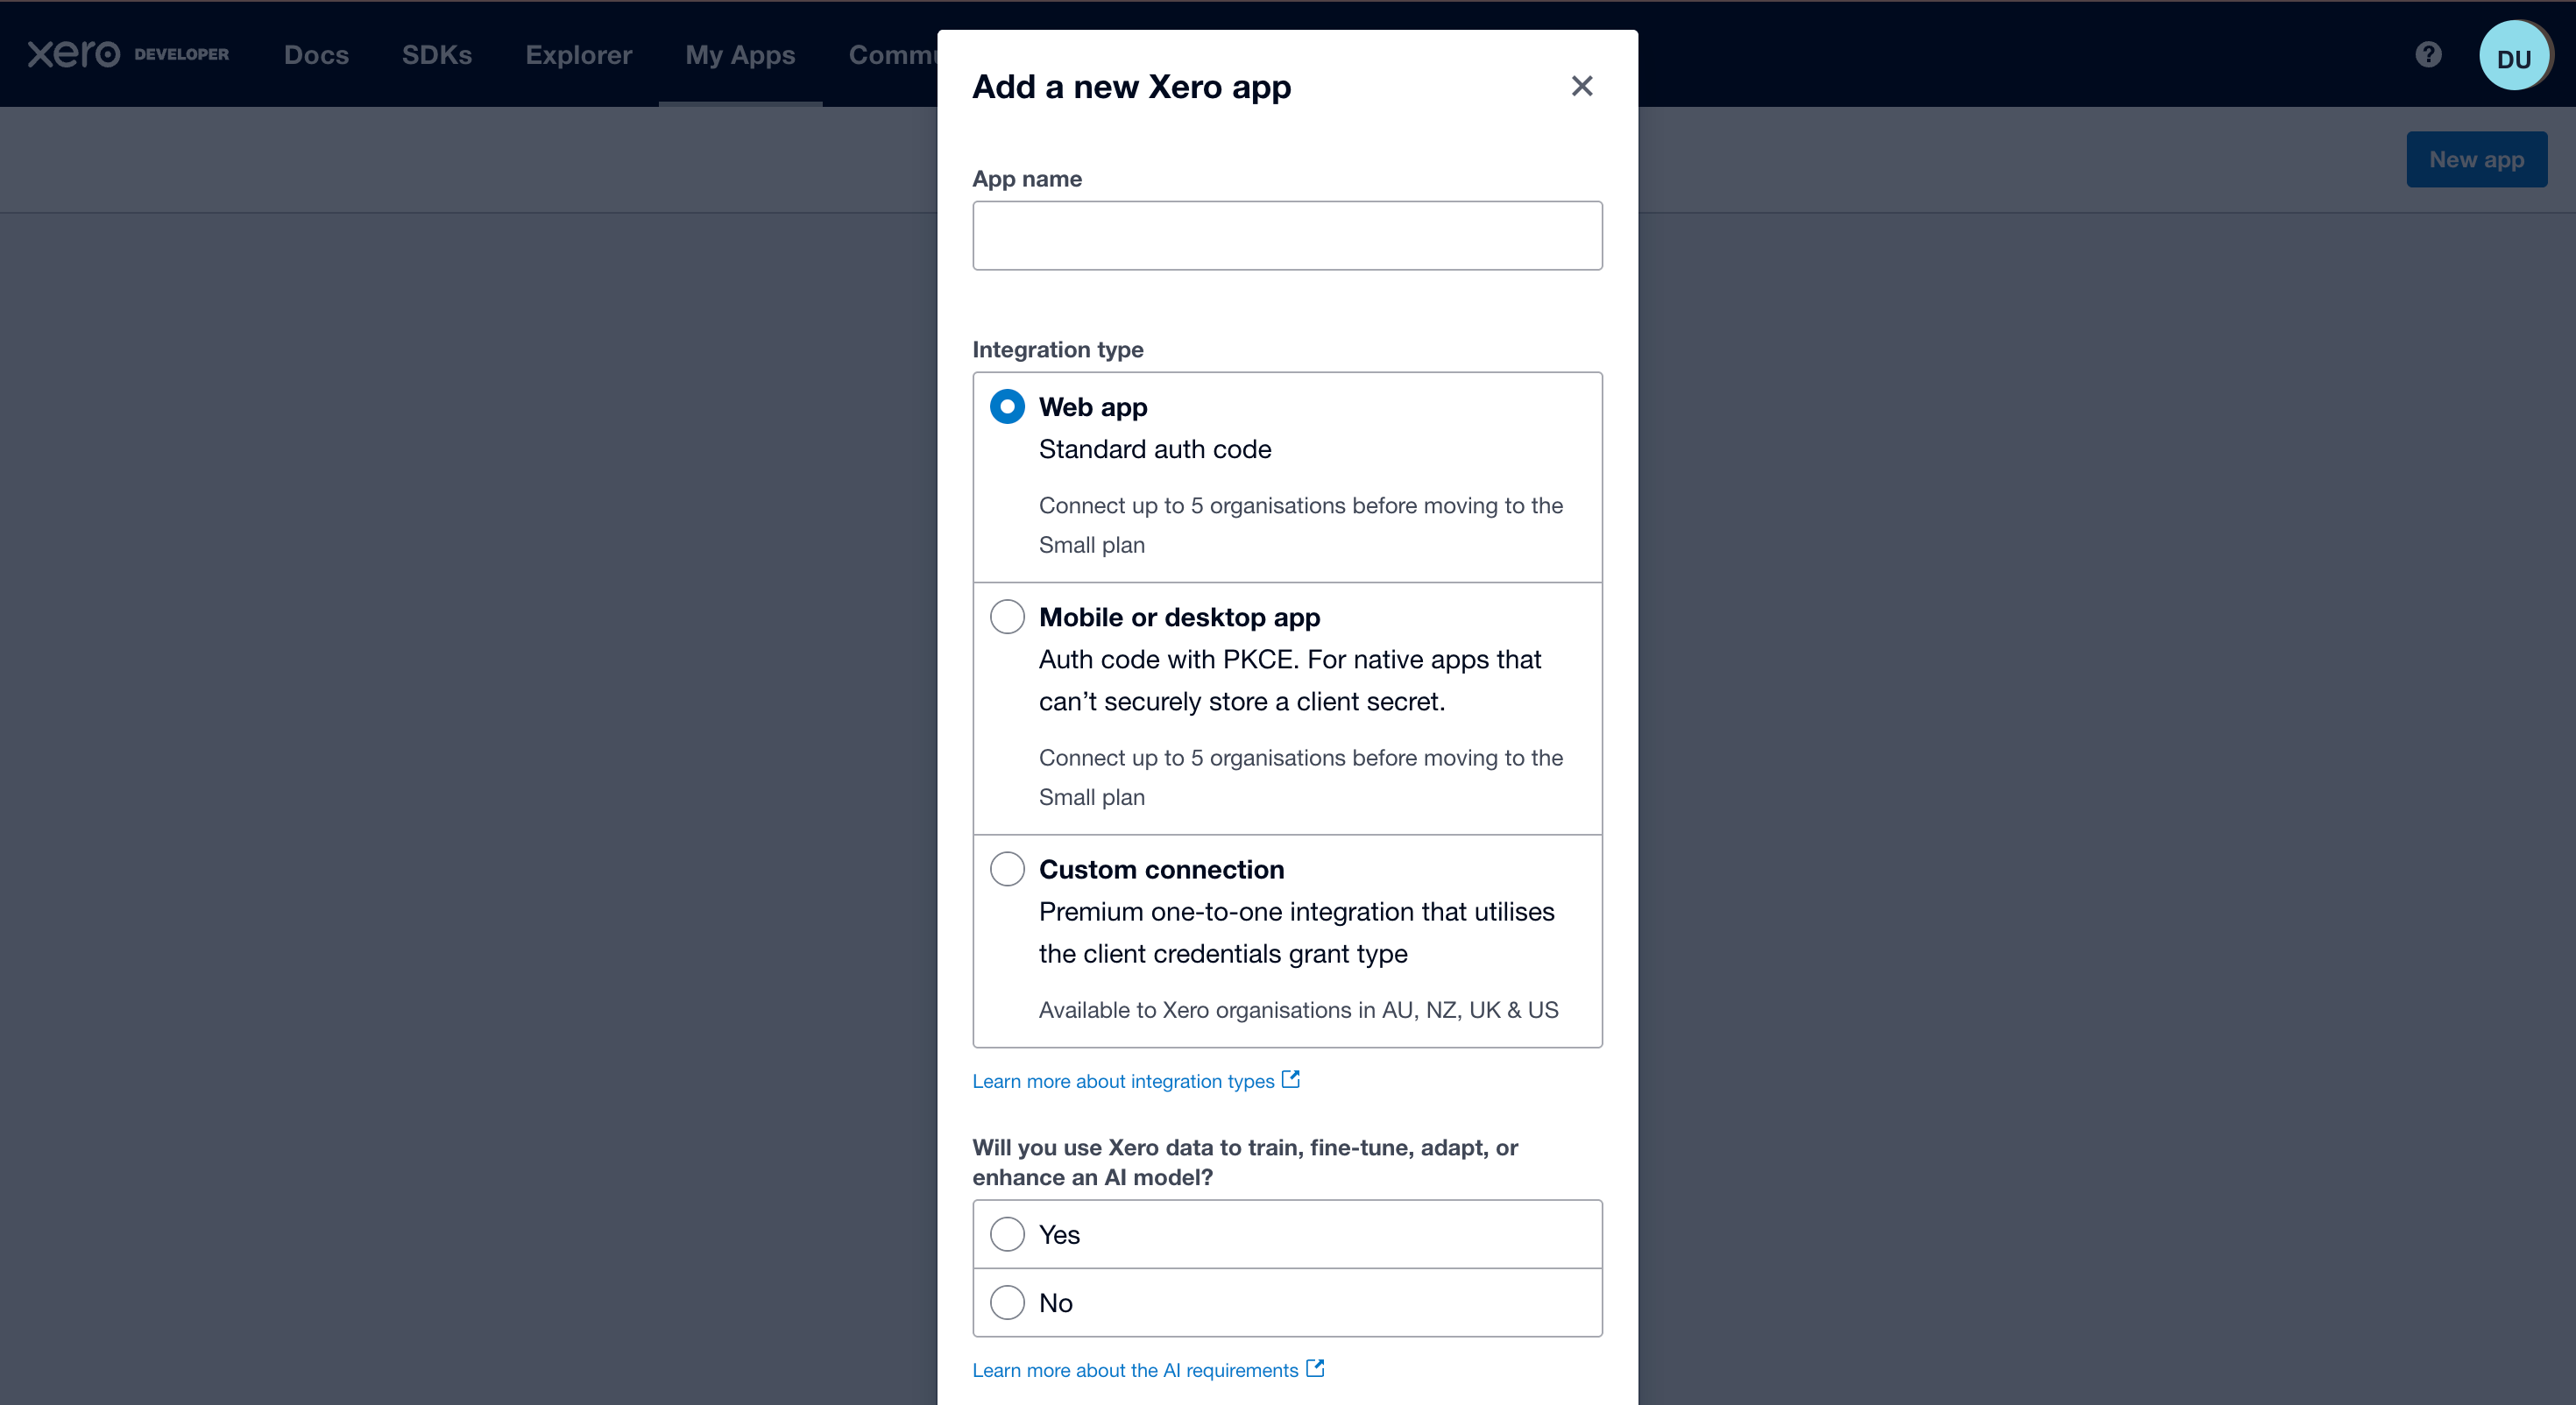
Use these fields as a guide:
| Field | What to enter |
|---|---|
| App name | Use a clear name such as Local MCP Connection. Do not use real internal project names. |
| Integration type | Select Custom connection. |
| AI model question | Answer truthfully. Select No when Xero data will not be used to train, fine-tune, adapt, or improve a model. |
| Security requirements | Review the linked requirements and select Yes only when the setup complies. |
| Company or application URL | Use a valid HTTPS URL you control, such as https://example.com. |
| Redirect URI | Only provide one if the form requires it. Use a placeholder such as https://example.com/callback. |
Do not paste credentials into app name, URL, privacy policy, terms, or redirect URI fields.
Success check: The Custom Connection appears in My Apps.
Step 4: Select a Read-Only Scope
A scope is a permission that controls which Xero data the connection can access.
A safe first test only needs one narrow, read-only scope:
accounting.settings.readThis scope grants read-only access to organisation and account settings, so the MCP server can read basic organisation details without changing accounting records. Xero also groups the Items endpoint under this same scope, and there is no separate item scope to add, so accounting.settings.read is enough both to confirm the connection authenticates and to run the list-items query that Step 7 below demonstrates.
The screenshot shows where scopes are configured. It also shows write-capable scopes selected, so do not copy those selections for your first test.
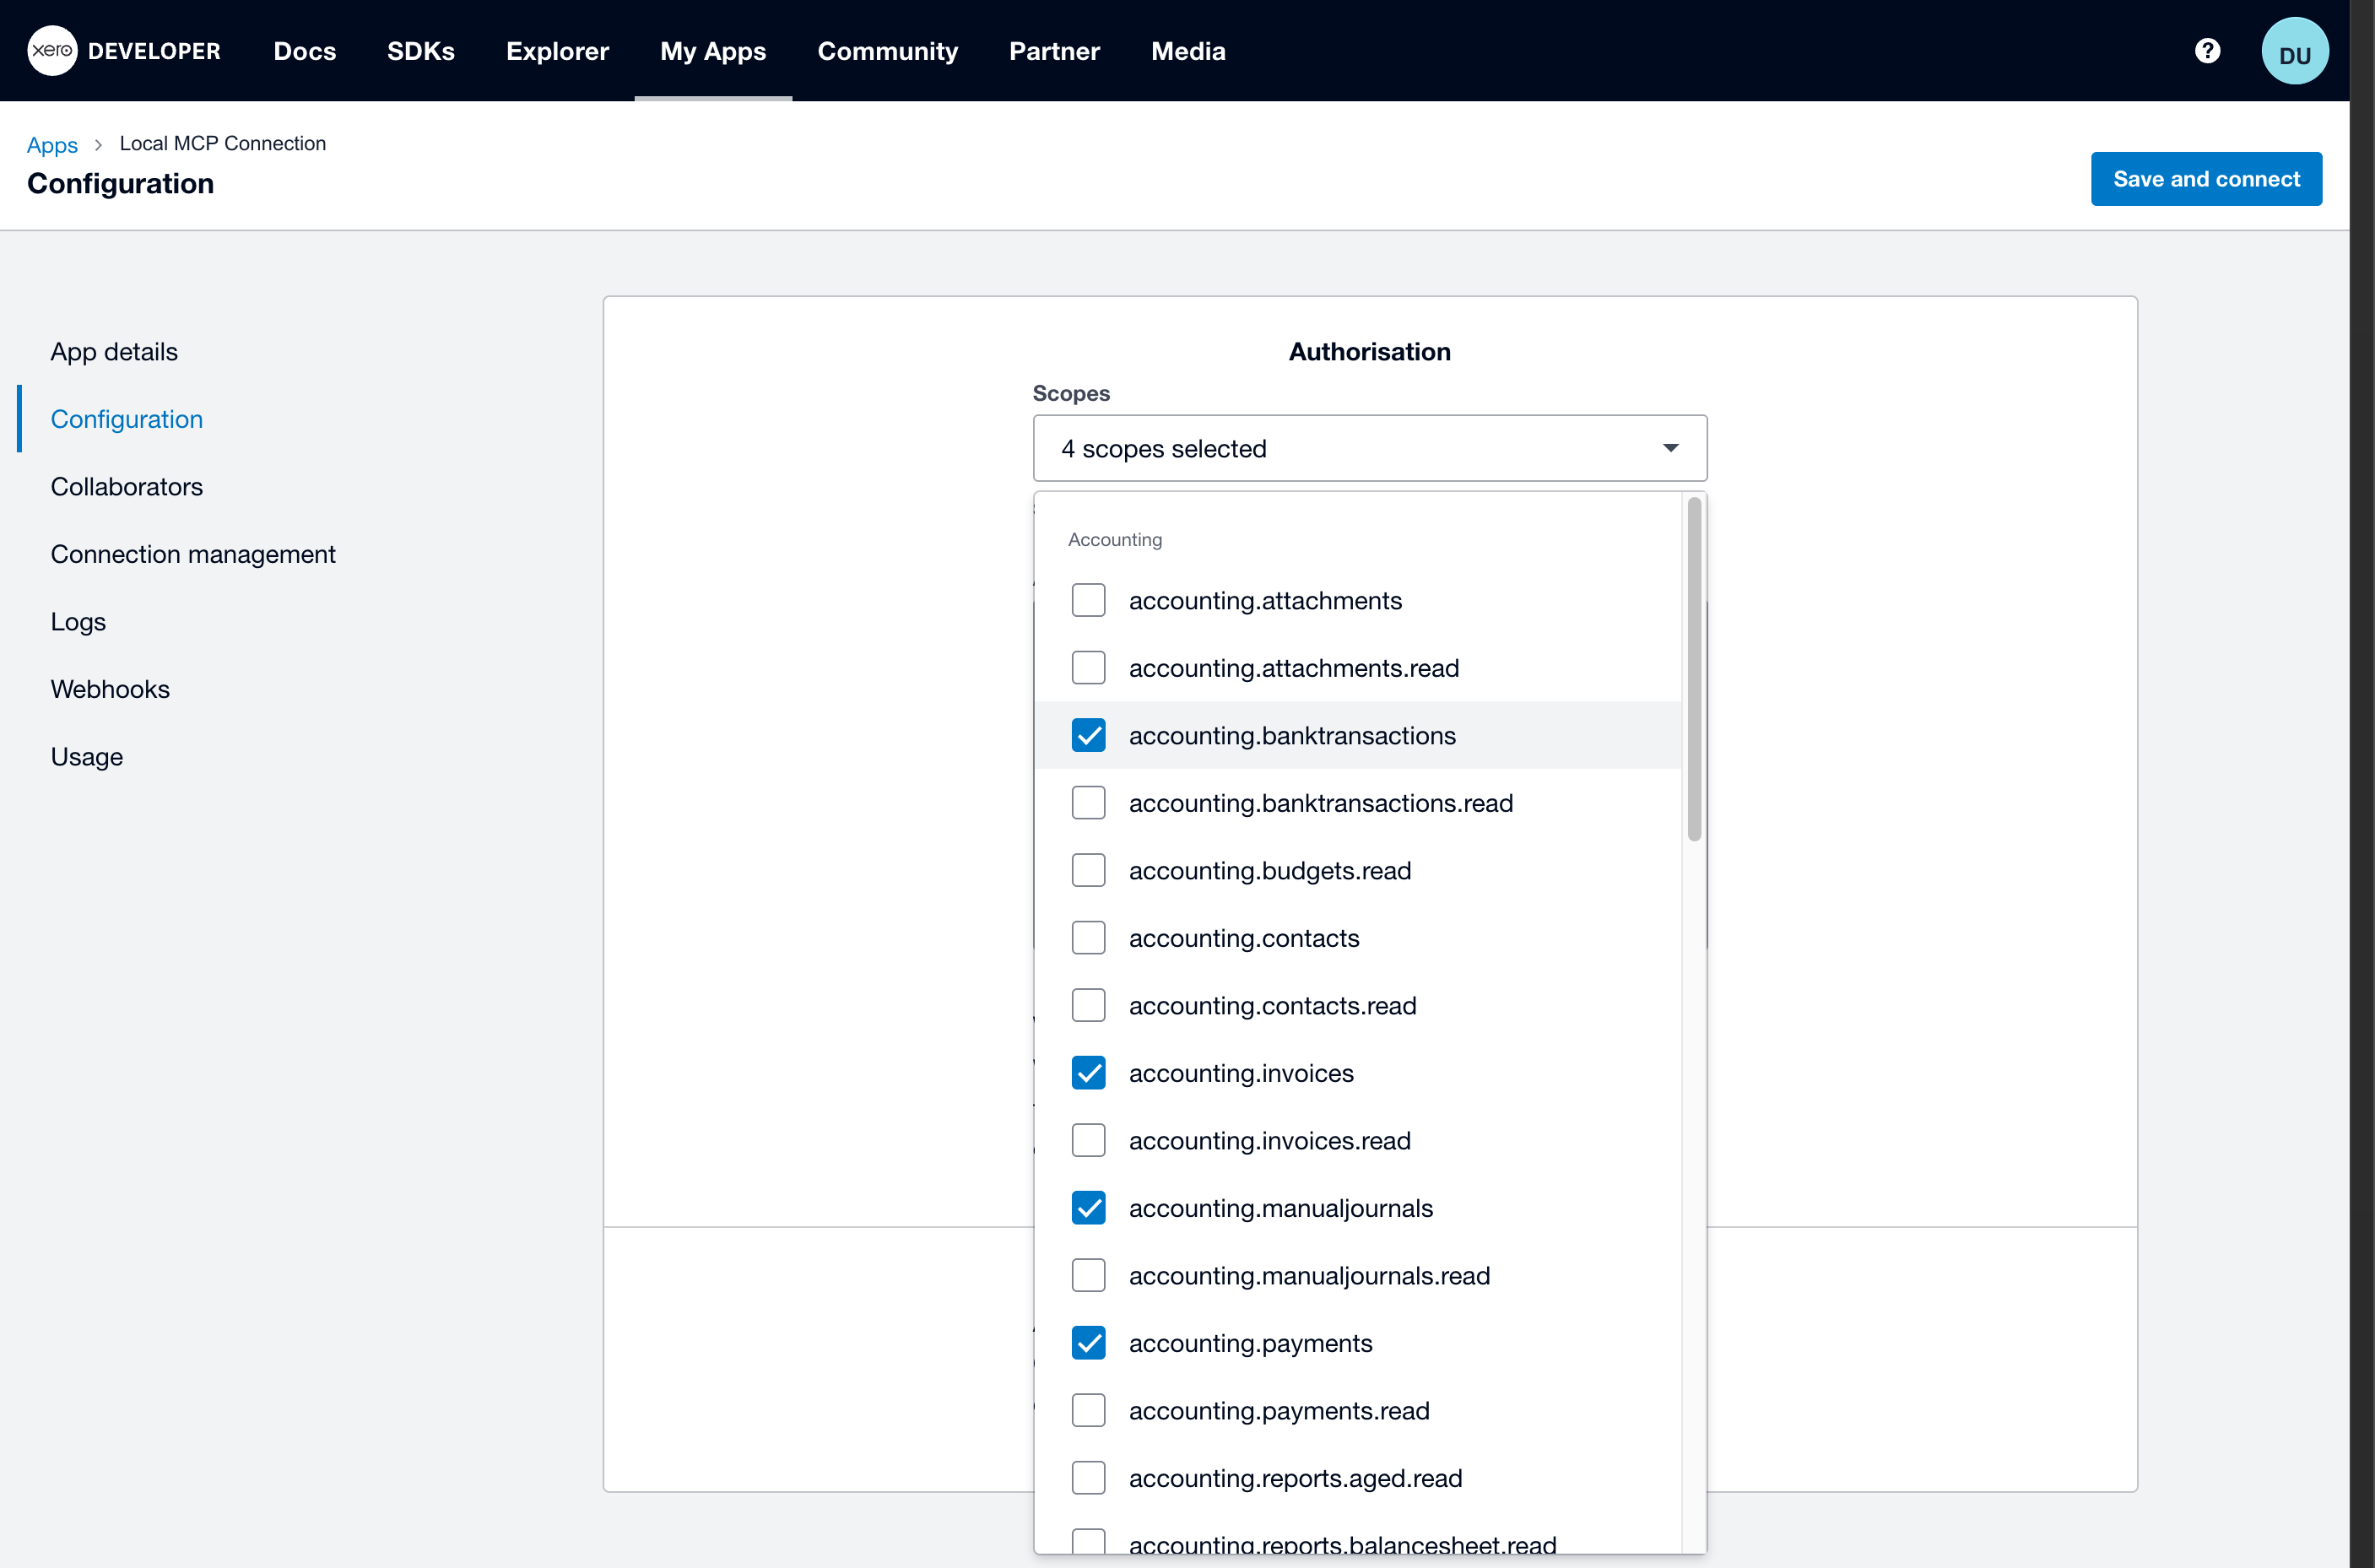
Write scopes for invoices, payments, bank transactions, journals, or payroll should not be enabled for the first connectivity test. Add broader scopes only when the required Xero MCP tool and business approval are known.
Select the authorised user and send the authorisation email.
Success check: The app is configured with accounting.settings.read and an authorisation email has been sent.
Step 5: Authorise the Demo Company
Open the latest authorisation email. Select the Demo Company, review the requested access, and click Allow access.
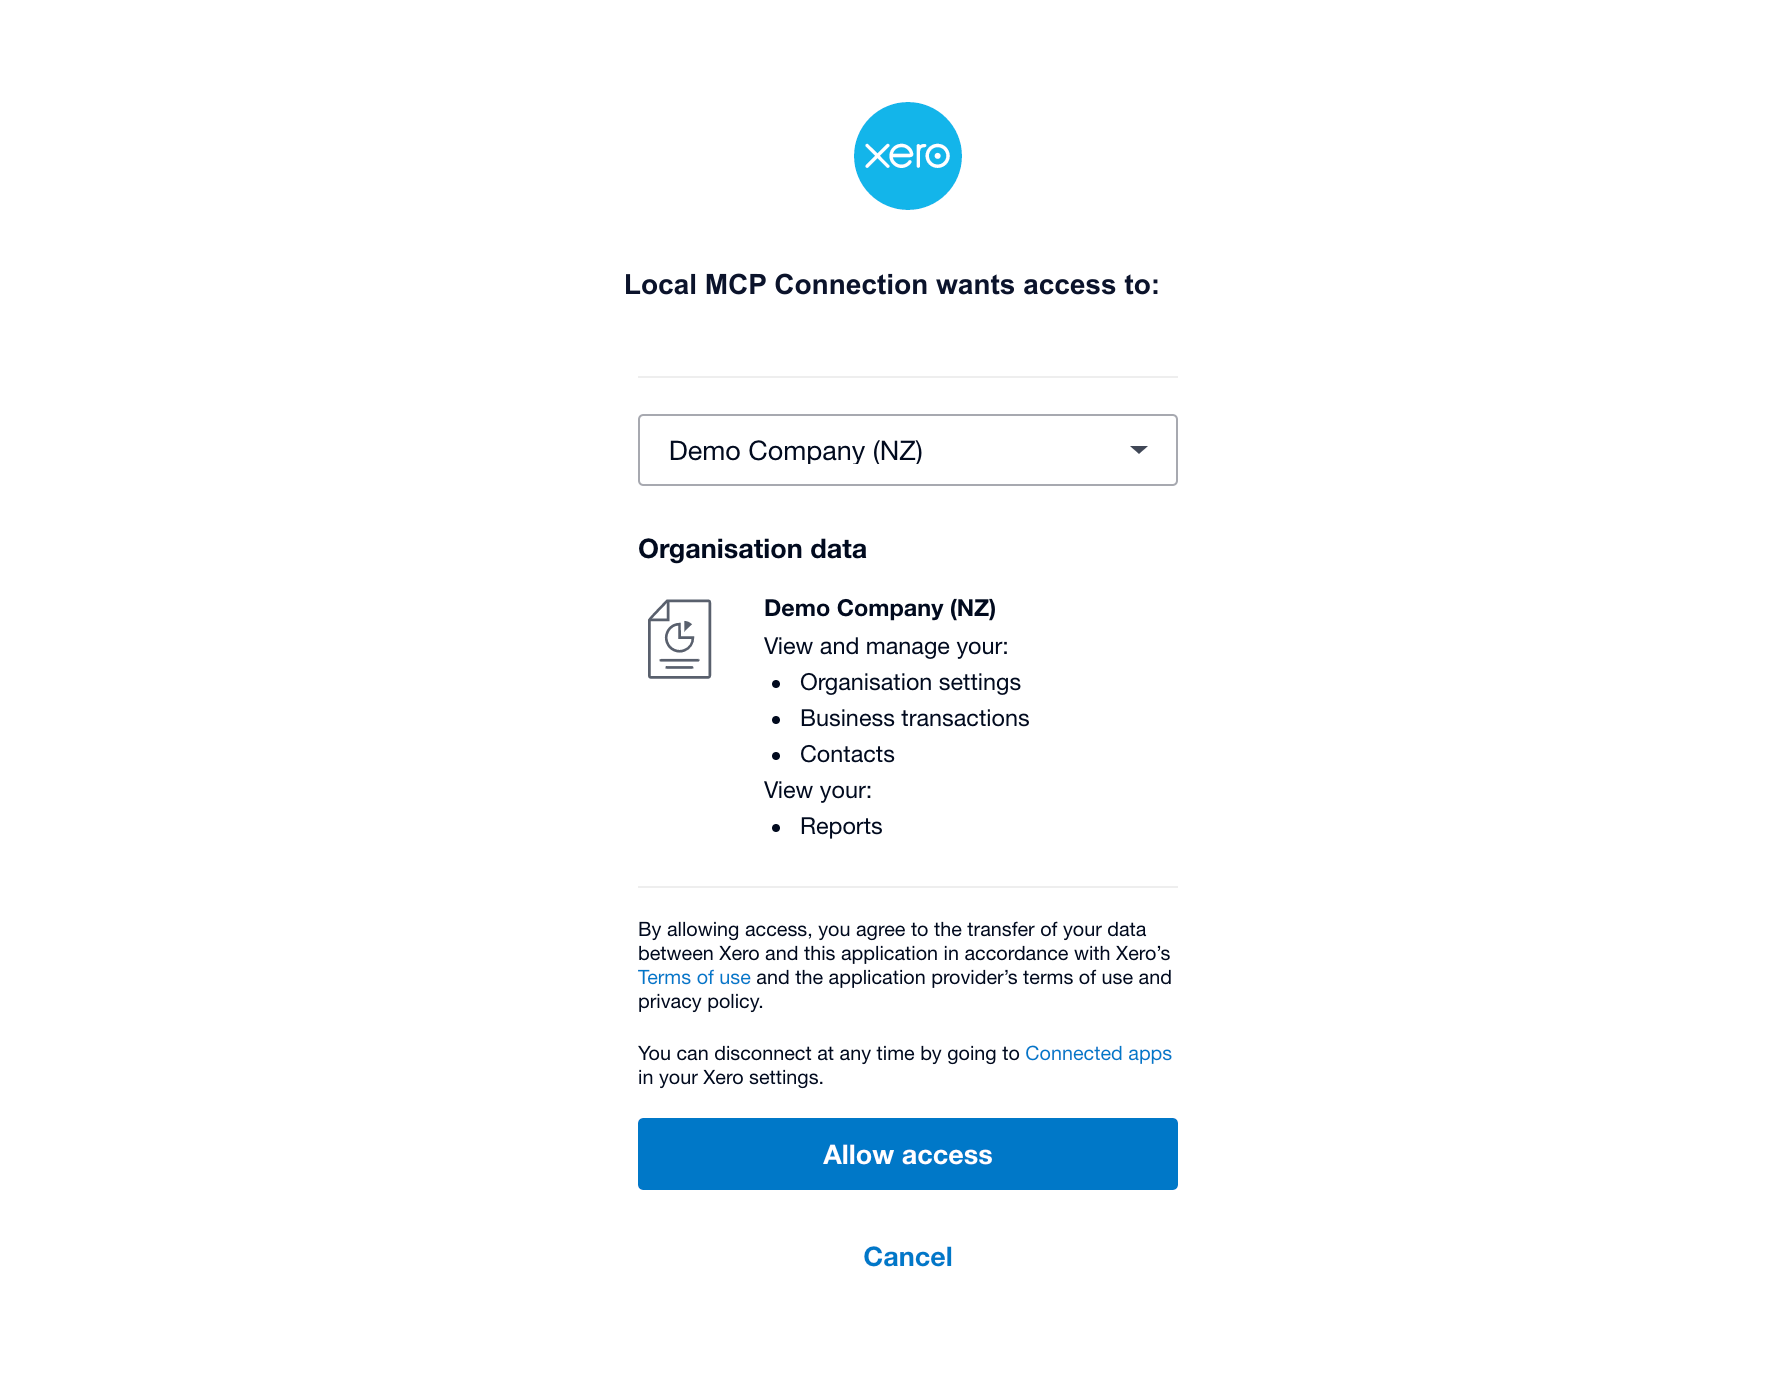
If Xero shows Subscription required to connect, first confirm that you selected Xero’s built-in Demo Company. For a real Xero organisation, the message may mean that the required Custom Connection subscription is not available.
Success check: The Demo Company is shown as connected.
Step 6: Copy the Credentials
Open the Custom Connection settings and copy:
- Client ID
- Client Secret
The Client ID and Client Secret are credentials used by the server to authenticate with Xero.
Never publish them, commit them to Git, or include real values in screenshots.
Use placeholders in documentation and examples:
XERO_CLIENT_ID="YOUR_XERO_CLIENT_ID"
XERO_CLIENT_SECRET="YOUR_XERO_CLIENT_SECRET"
XERO_SCOPES="accounting.settings.read"
Keep the real values only in your private MCP configuration or secret manager.
A Custom Connection belongs to one Xero organisation. To connect another organisation, use a Custom Connection authorised for that organisation.
Success check: You have copied the Client ID and Client Secret into a private location.
Step 7: Build and Test the Official Xero MCP Server
Xero maintains the official open-source server in the Xero MCP server GitHub repository.
Run these commands to clone and build it:
git clone https://github.com/XeroAPI/xero-mcp-server.git
cd xero-mcp-server
npm install
npm run build
Confirm that the build created the server entry point:
ls -l dist/index.jsNext, enter the Client ID and Client Secret from your authorised Xero Custom Connection:
export XERO_CLIENT_ID="YOUR_XERO_CLIENT_ID"
export XERO_CLIENT_SECRET="YOUR_XERO_CLIENT_SECRET"
export XERO_SCOPES="accounting.settings.read"
Replace the placeholders with your real credentials. Keep the scope aligned with the scope authorised in Xero Developer.
From the same terminal and repository, launch MCP Inspector:
npx -y @modelcontextprotocol/inspector \
  -e XERO_CLIENT_ID="$XERO_CLIENT_ID" \
  -e XERO_CLIENT_SECRET="$XERO_CLIENT_SECRET" \
  -e XERO_SCOPES="$XERO_SCOPES" \
  node "$(pwd)/dist/index.js"
Inspector opens a local browser page, normally at a URL beginning with:
http://localhost:6274/That page is what Inspector shows when it first opens. The Servers tab lists the node server you launched over STDIO, with the command pointing at your built dist/index.js, and it stays marked Disconnected until you start the session yourself.
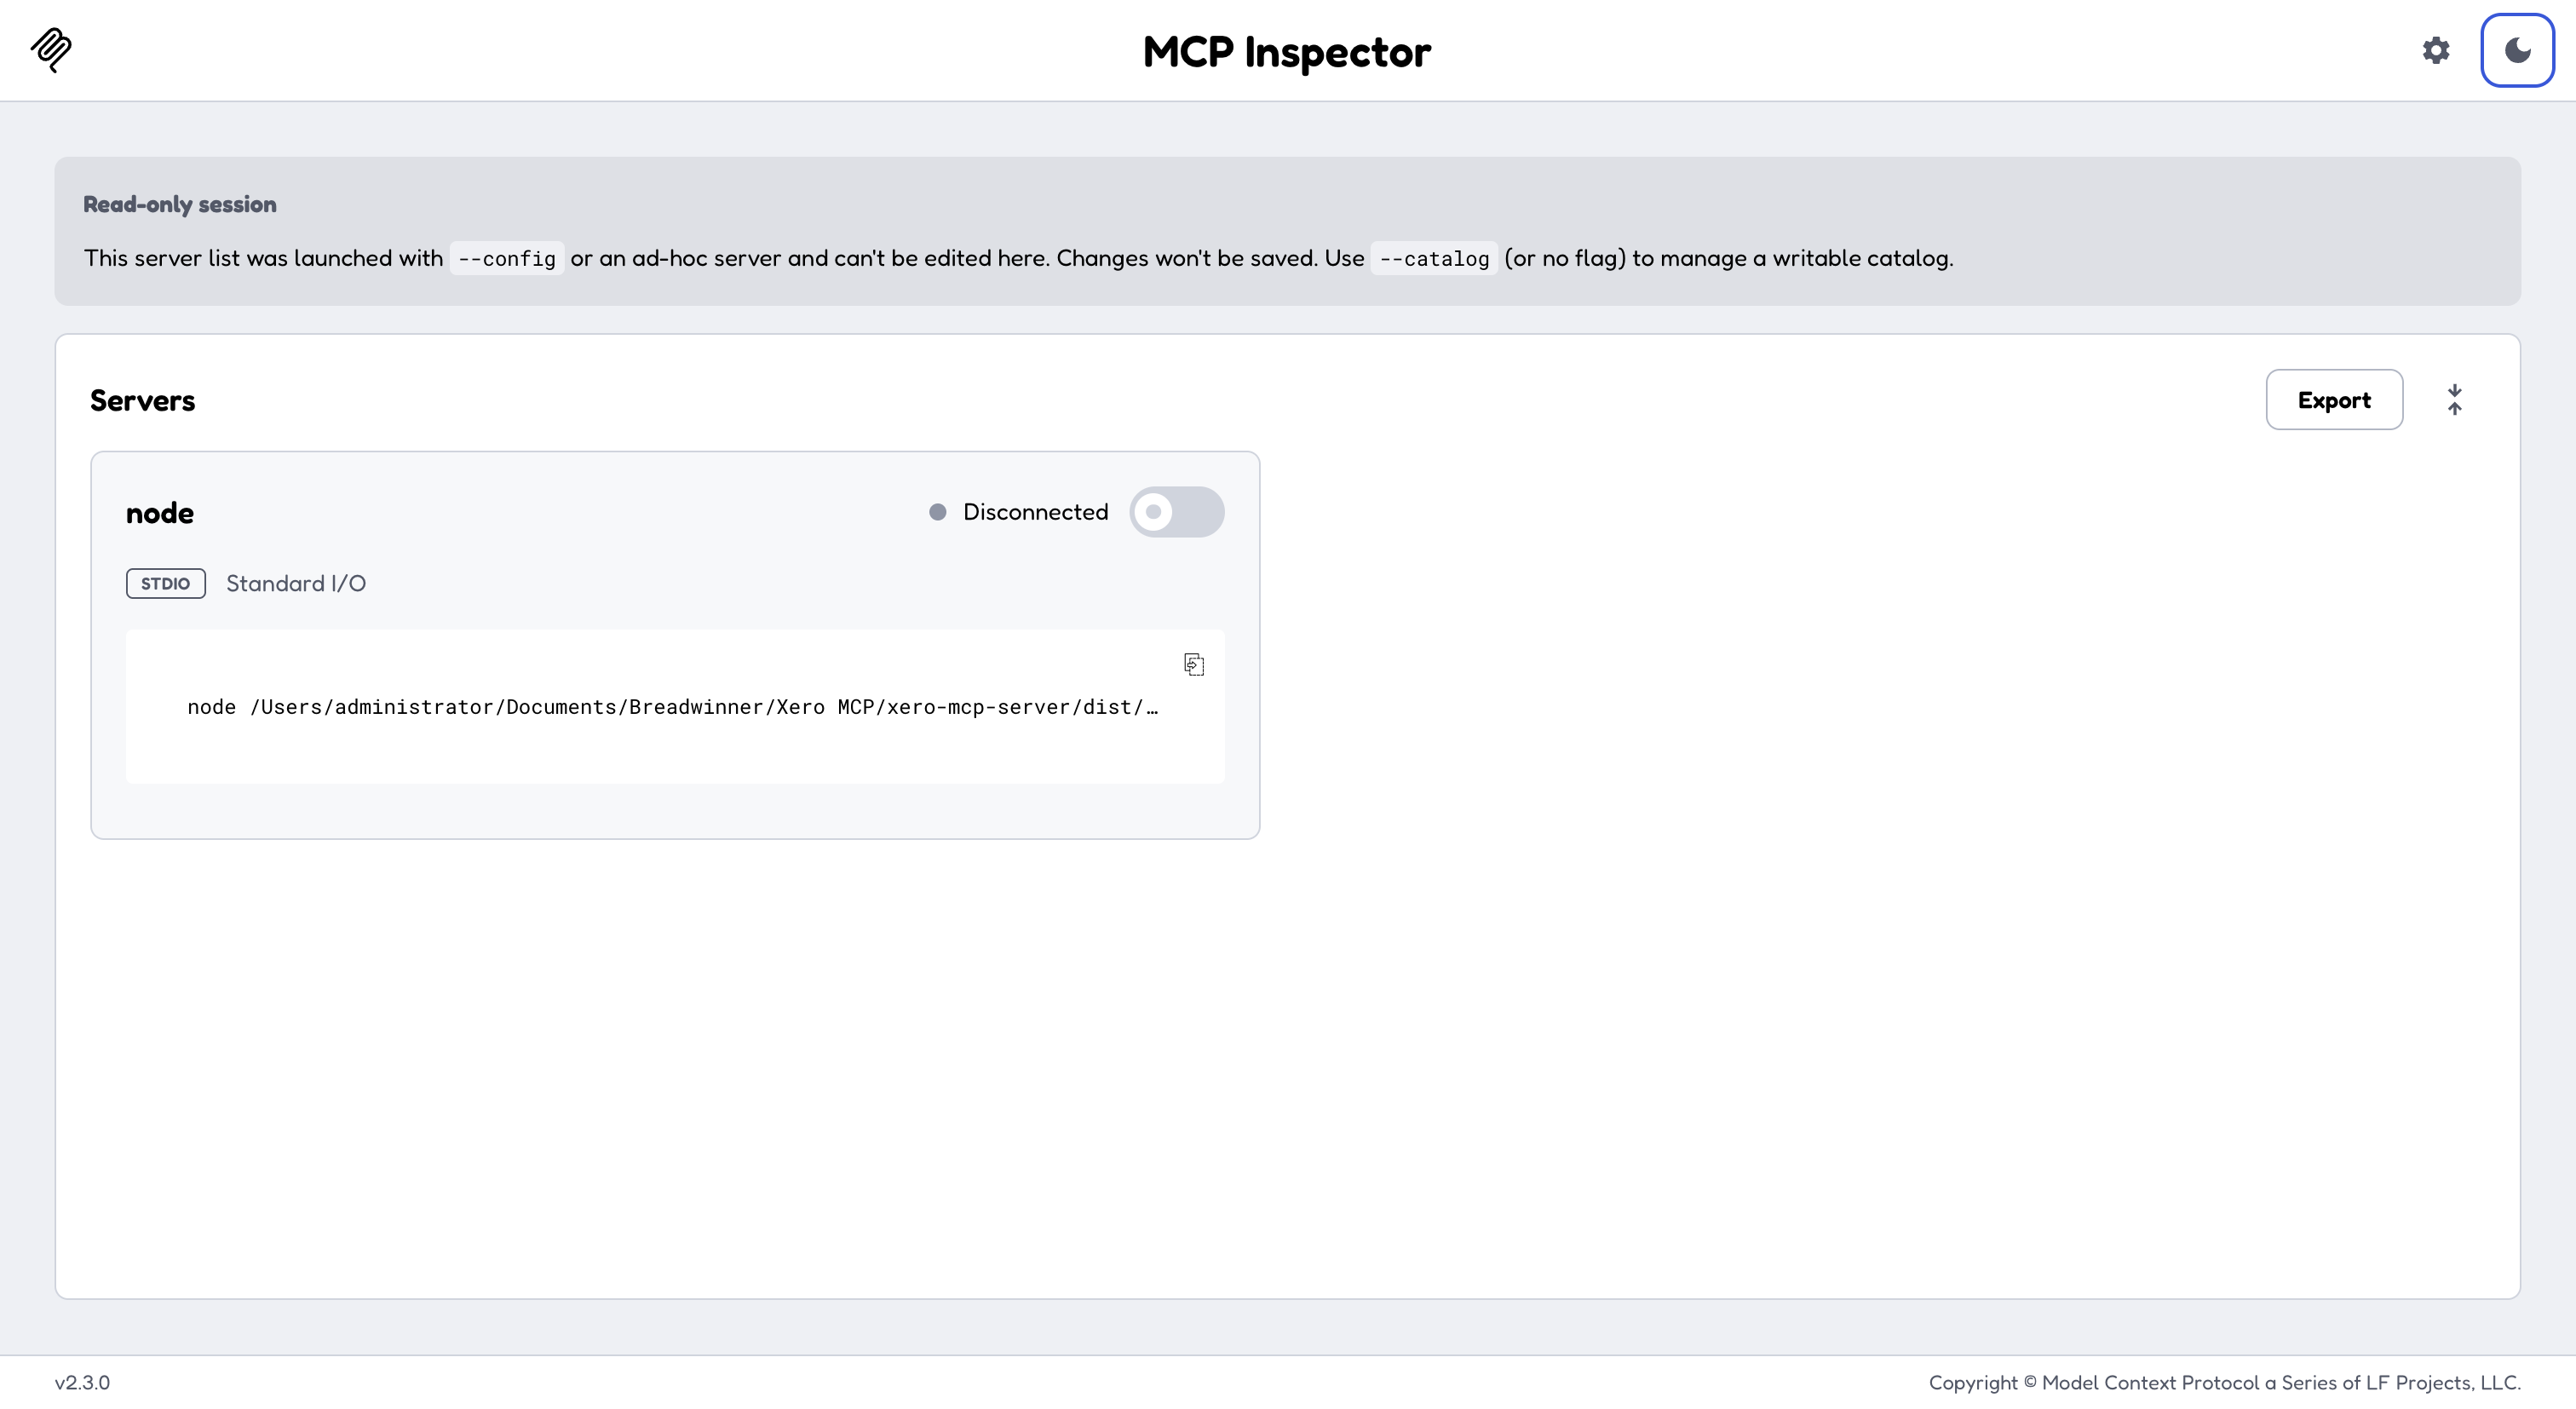
In Inspector:
- Confirm the transport is STDIO.
- Confirm the server path ends with
xero-mcp-server/dist/index.js. - Flip the toggle switch next to the server name. The status changes from Disconnected to Connected.
- Open Tools and select List Tools.
- Run
list-items.
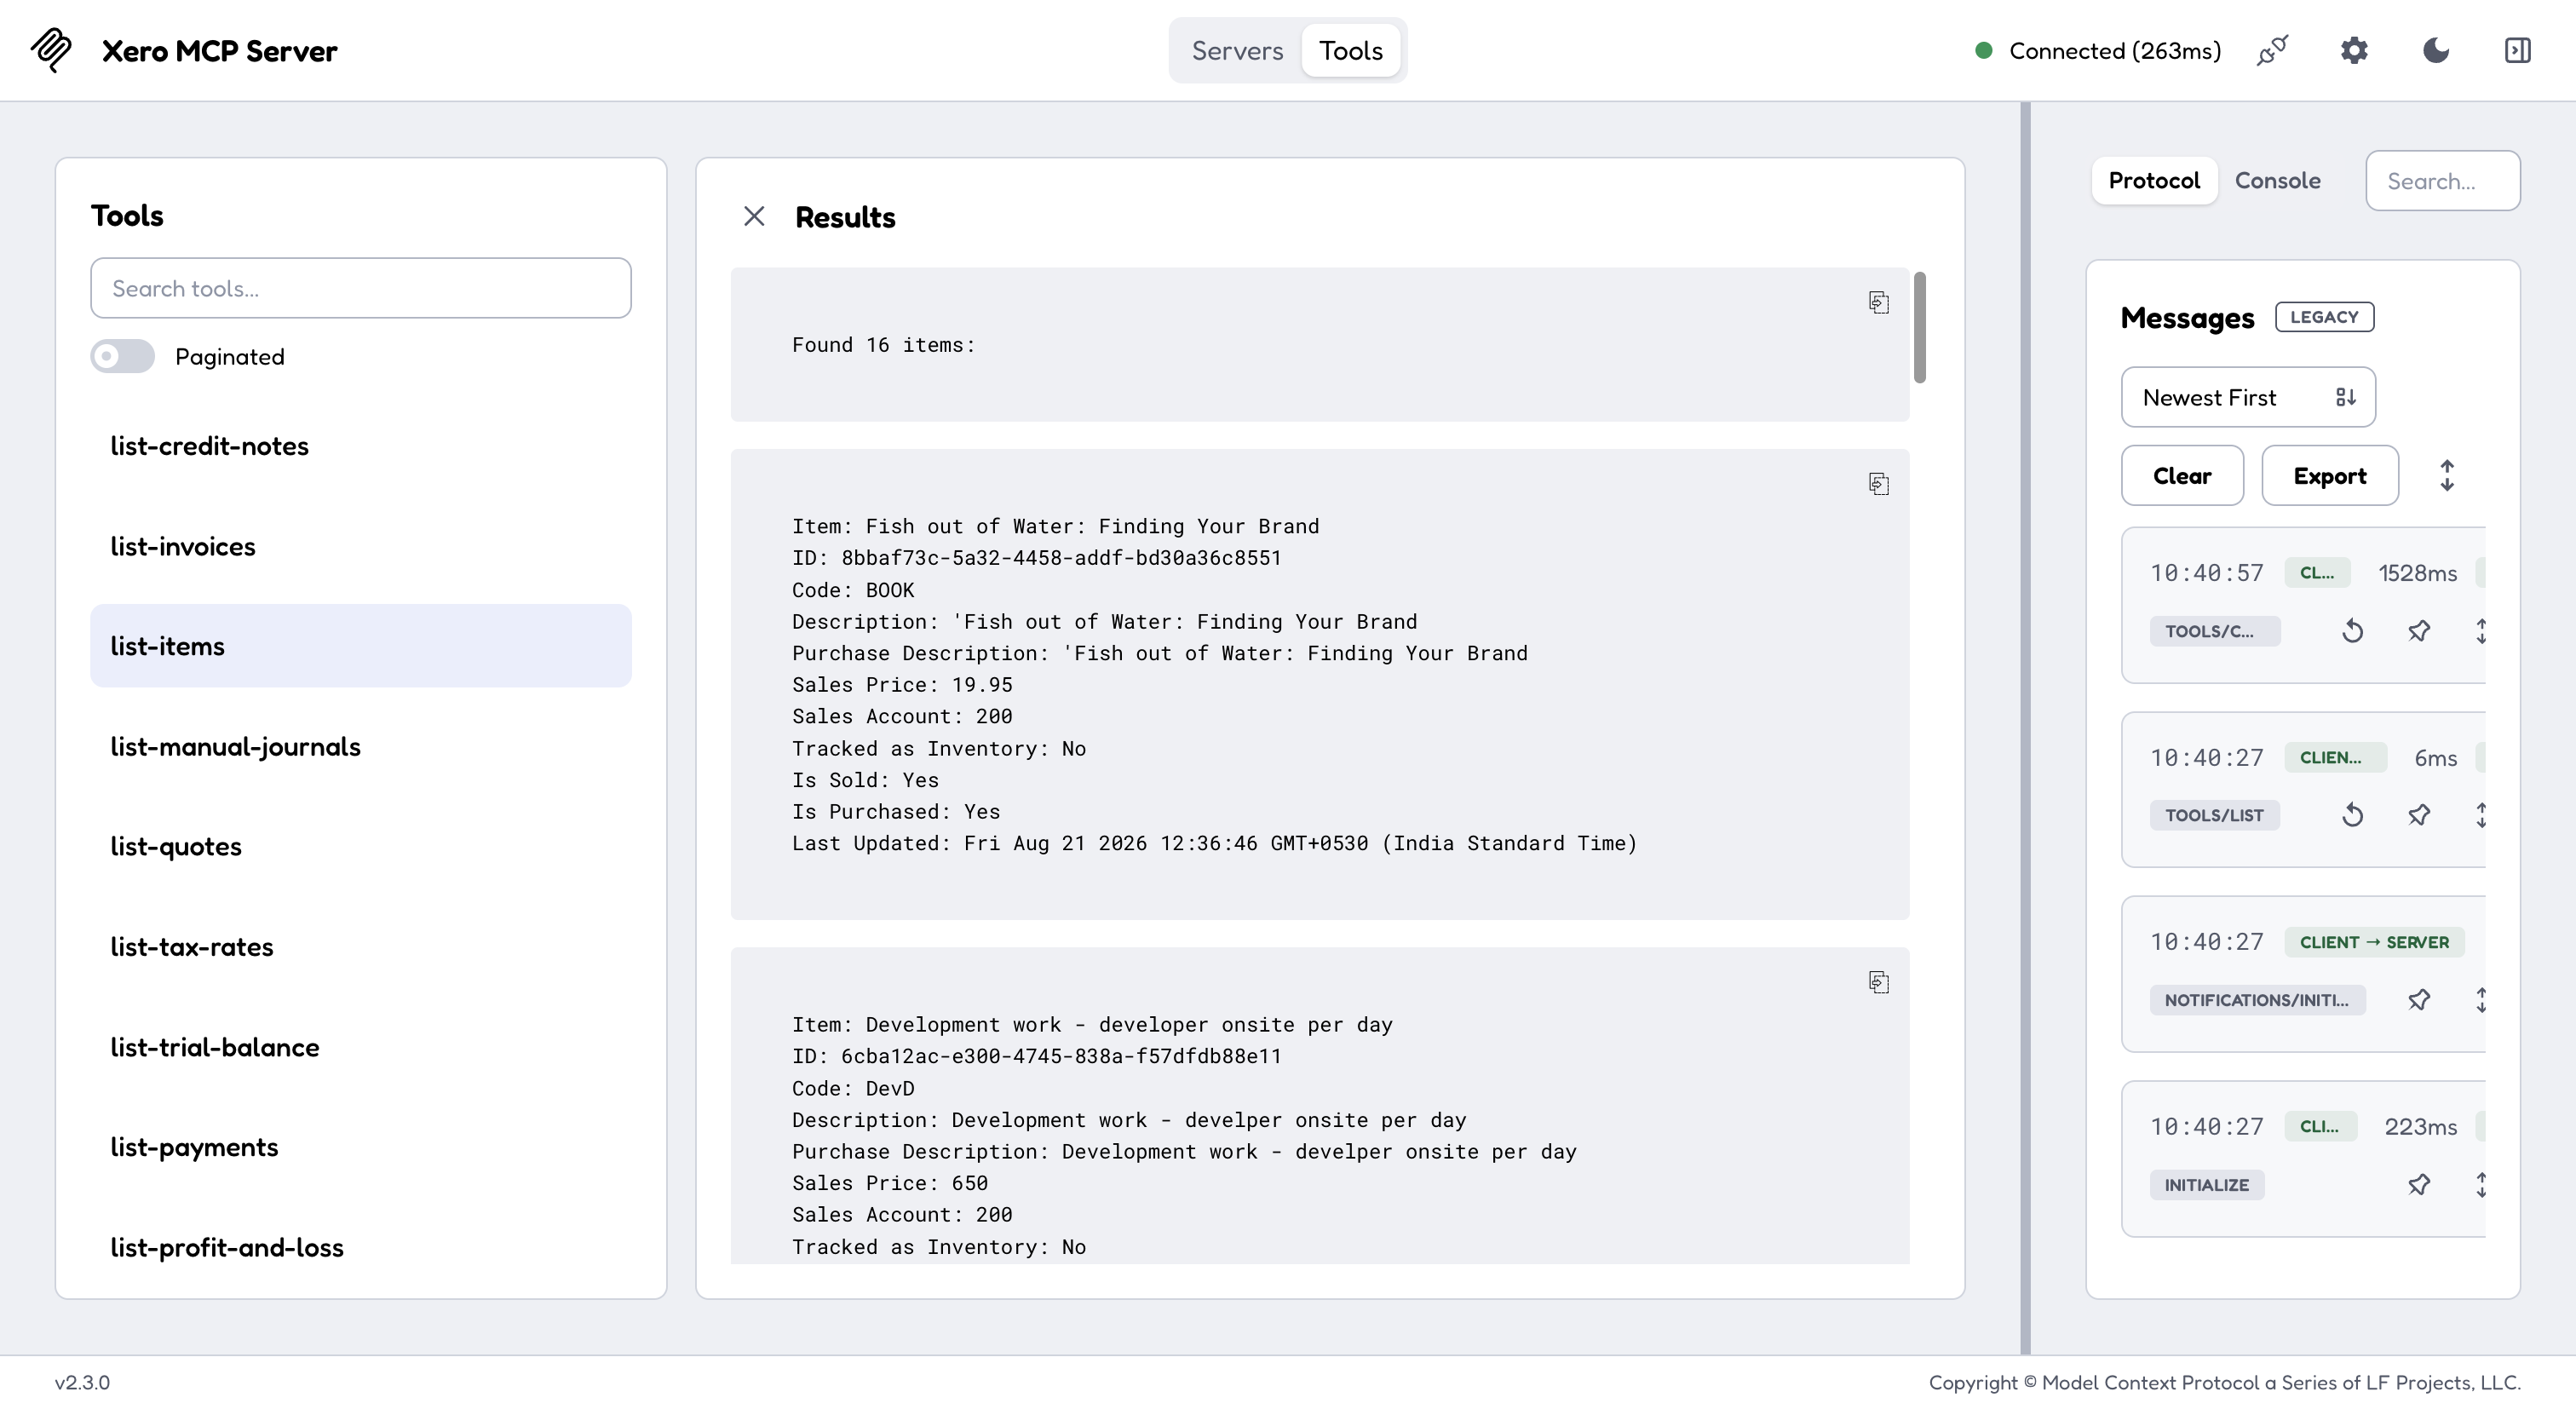
A successful response opens with the number of records found, then lists each item returned from the connected organisation:
Found 16 items:

Item: <item name>
ID: <item id>
Code: <item code>
Description: <item description>
Sales Price: <amount>
Sales Account: <account code>
Tracked as Inventory: No
Is Sold: Yes
Is Purchased: Yes
The number of items and the values shown depend on the Demo Company region.
list-items needs the matching item scope authorised on the Custom Connection. If it returns invalid_scope, authorise the required scope in Xero Developer, re-authorise the connection, and run the tool again.
Success check: Inspector shows the Xero tools and list-items returns items from the connected Xero organisation.
The Tools tab shows the connected server, the tool you selected, and the records Xero returned, which confirms the credentials, scope, and stdio transport are all working end to end.
After the first test succeeds, you can run another read-only tool such as list-organisation-details or list-accounts after authorising the required scope in Xero Developer.
Common Xero MCP Setup Errors
| Problem | What to check |
|---|---|
Invalid parameter format: XERO_CLIENT_ID= |
Enter the Client ID and Client Secret in the export commands, then rerun the Inspector command in the same terminal. |
| Inspector shows another MCP server | Replace the saved server path with the absolute path to Xero’s dist/index.js, then reconnect. |
invalid_client |
Copy the current Client ID and Client Secret from the correct Xero Custom Connection. |
invalid_scope |
Confirm XERO_SCOPES matches the scopes authorised in Xero Developer. Separate multiple scopes with spaces. |
Cannot find module .../dist/index.js |
Run npm install and npm run build, then confirm dist/index.js exists. |
| No Xero tools appear | Confirm the server path, STDIO transport, credentials, scopes, and that Inspector is connected. |
If an error survives those checks, Xero MCP troubleshooting goes further on invalid_scope, invalid_client, missing tools, and Custom Connection re-authorisation.
When testing is complete, stop Inspector with Ctrl+C.
Sharing the Connection With a Team
A local Xero MCP setup works best for one developer or technical user.
Each computer needs its own MCP configuration, credentials, updates, and troubleshooting. This becomes harder to manage when several people need access.
| Setup | Best for | Main limitation |
|---|---|---|
| Local Xero MCP | One developer or technical user | Runs and stores credentials on one computer |
| Separate local installations | Small technical team | Every device needs setup and maintenance |
| Hosted connection | Finance or operations team | Requires a managed provider and subscription |
Xero MCP Setup FAQ
Is the official Xero MCP server free?
The official package can be run locally with npx. Xero account, Custom Connection, and production organisation requirements are separate from the package itself.
Can I test Xero MCP without real accounting data?
Yes. Use Xero’s built-in Demo Company. It contains fictional data and is the safest place to test the local Xero MCP connection.
Why does the Xero MCP server show no terminal output?
That is normal for a local MCP server using STDIO. It waits for the MCP client to start it and send requests.
Can I connect a real Xero organisation?
Yes. Complete the Demo Company test first. A real organisation may require a paid Custom Connection, suitable permissions, and carefully reviewed scopes.
Can I share a local Xero MCP server with my team?
A local server usually runs on one computer and stores credentials on that device. Small technical teams can repeat the setup on approved devices, but larger teams may prefer a centrally managed hosted connection.
A Managed Xero MCP Option for Teams
The official local Xero MCP server is a good choice when one developer or technical user can manage the setup.
When several people need access, a managed service can reduce the work required to configure and maintain separate local installations.
Kipper is one hosted option for teams that want a centrally managed Xero connection with controlled access and audit logging. It reads a defined set of Xero records, and 30 Questions You Can Ask AI About Your Xero Data shows what that covers in practice.
Learn more about a hosted Xero MCP connector for finance teams, or the per-client routes: read-only Xero access inside Claude, Xero records in ChatGPT, and the same connection in Gemini.